Collingwood

Original price
£13.49
-
Original price
£13.49
Original price
£13.49
Inc VAT
£11.24
Exc VAT
£13.49
-
£13.49
Current price
£11.24
Inc VAT
£11.24
-
£11.24
Exc VAT
Current price
£11.24
Exc VAT
Collingwood DLT388BS5530 H2 Lite 4.3W Dimmable LED Fire-Rated Downlight 3000K Brushed Steel
Availability:
Dispatch in 1-2 Days
Collingwood DLT388BS5530 H2 Lite 4.3W Dimmable LED Fire-Rated Downlight 3000K Brushed Steel Product Description TRIAC Dimmable, fire-rated downli...
View full details
Original price
£13.49
-
Original price
£13.49
Original price
£13.49
Inc VAT
£11.24
Exc VAT
£13.49
-
£13.49
Current price
£11.24
Inc VAT
£11.24
-
£11.24
Exc VAT
Current price
£11.24
Exc VAT

Original price
£13.49
-
Original price
£13.49
Original price
£13.49
Inc VAT
£11.24
Exc VAT
£13.49
-
£13.49
Current price
£11.24
Inc VAT
£11.24
-
£11.24
Exc VAT
Current price
£11.24
Exc VAT
Collingwood DLT388BS5540 H2 Lite 460 4.3W Dimmable LED Fire-Rated Downlight 4000K Brushed Steel
Availability:
Dispatch in 1-2 Days
Collingwood DLT388BS5540 H2 Lite 4.3W Dimmable LED Fire-Rated Downlight 4000K Brushed Steel Product Description TRIAC Dimmable, fire-rated downli...
View full details
Original price
£13.49
-
Original price
£13.49
Original price
£13.49
Inc VAT
£11.24
Exc VAT
£13.49
-
£13.49
Current price
£11.24
Inc VAT
£11.24
-
£11.24
Exc VAT
Current price
£11.24
Exc VAT

Original price
£13.49
-
Original price
£13.49
Original price
£13.49
Inc VAT
£11.24
Exc VAT
£13.49
-
£13.49
Current price
£11.24
Inc VAT
£11.24
-
£11.24
Exc VAT
Current price
£11.24
Exc VAT
Collingwood DLT388MW5530 H2 Lite 4.3W Dimmable LED Fire-Rated Downlight 3000K Matt White
Availability:
Dispatch in 1-2 Days
Collingwood DLT388MW5530 H2 Lite 4.3W Dimmable LED Fire-Rated Downlight 3000K Matt White Product Description TRIAC Dimmable, fire-rated downlight...
View full details
Original price
£13.49
-
Original price
£13.49
Original price
£13.49
Inc VAT
£11.24
Exc VAT
£13.49
-
£13.49
Current price
£11.24
Inc VAT
£11.24
-
£11.24
Exc VAT
Current price
£11.24
Exc VAT

Original price
£89.00
-
Original price
£89.00
Original price
£89.00
Inc VAT
£74.17
Exc VAT
£89.00
-
£89.00
Current price
£74.17
Inc VAT
£74.17
-
£74.17
Exc VAT
Current price
£74.17
Exc VAT
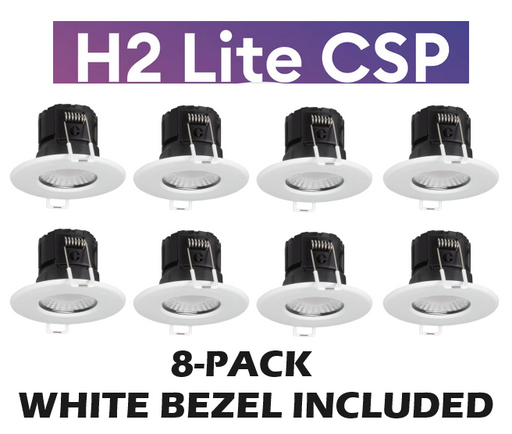
Collingwood DLT388MW5530A8 H2 Lite 4.3W Dimmable LED Fire-Rated Downlight 3000K Matt White (8-Multipack)
Availability:
Dispatch in 1-2 Days
Collingwood DLT388MW5530A8 H2 Lite 4.3W Dimmable LED Fire-Rated Downlight 3000K Matt White (8-Multipack) Product Description TRIAC Dimmable, fire-...
View full details
Original price
£89.00
-
Original price
£89.00
Original price
£89.00
Inc VAT
£74.17
Exc VAT
£89.00
-
£89.00
Current price
£74.17
Inc VAT
£74.17
-
£74.17
Exc VAT
Current price
£74.17
Exc VAT

Original price
£13.49
-
Original price
£13.49
Original price
£13.49
Inc VAT
£11.24
Exc VAT
£13.49
-
£13.49
Current price
£11.24
Inc VAT
£11.24
-
£11.24
Exc VAT
Current price
£11.24
Exc VAT
Collingwood DLT388MW5540 H2 Lite 460 4.3W Dimmable LED Fire-Rated Downlight 4000K Matt White
Availability:
Dispatch in 1-2 Days
Collingwood DLT388MW5540 H2 Lite 4.3W Dimmable LED Fire-Rated Downlight 4000K Matt White Product Description TRIAC Dimmable, fire-rated downlight...
View full details
Original price
£13.49
-
Original price
£13.49
Original price
£13.49
Inc VAT
£11.24
Exc VAT
£13.49
-
£13.49
Current price
£11.24
Inc VAT
£11.24
-
£11.24
Exc VAT
Current price
£11.24
Exc VAT

Original price
£13.79
Original price
£13.79
-
Original price
£13.79
Original price
£13.79
Current price
£11.46
Inc VAT
Current price
£9.55
Exc VAT
£11.46
-
£11.46
Current price
£9.55
Inc VAT
£9.55
-
£9.55
Exc VAT
Current price
£9.55
Exc VAT
Collingwood DLT551500A H2 Lite CSP 4.2W-6W IP65 Fire-Rated Fixed CCT LED Dimmable Downlight with Matt White Bezel
Availability:
IN STOCK
Collingwood DLT551500A H2 Lite CSP 4.2W-6W IP65 Fire-Rated Fixed CCT LED Dimmable Downlight with Matt White Bezel Product Description Colour & ...
View full details
Original price
£13.79
Original price
£13.79
-
Original price
£13.79
Original price
£13.79
Current price
£11.46
Inc VAT
Current price
£9.55
Exc VAT
£11.46
-
£11.46
Current price
£9.55
Inc VAT
£9.55
-
£9.55
Exc VAT
Current price
£9.55
Exc VAT
Original price
£99.99
Original price
£99.99
-
Original price
£99.99
Original price
£99.99
Current price
£77.39
Inc VAT
Current price
£64.49
Exc VAT
£77.39
-
£77.39
Current price
£64.49
Inc VAT
£64.49
-
£64.49
Exc VAT
Current price
£64.49
Exc VAT
Collingwood DLT551500A8 H2 Lite CSP 4.2W-6W IP65 Fire-Rated Fixed CCT LED Dimmable Downlight with Matt White Bezel (8 Pack)
Availability:
IN STOCK
Collingwood DLT551500A8 H2 Lite CSP 4.2W-6W IP65 Fire-Rated Fixed CCT LED Dimmable Downlight with Matt White Bezel (8 Pack) Product Description Col...
View full details
Original price
£99.99
Original price
£99.99
-
Original price
£99.99
Original price
£99.99
Current price
£77.39
Inc VAT
Current price
£64.49
Exc VAT
£77.39
-
£77.39
Current price
£64.49
Inc VAT
£64.49
-
£64.49
Exc VAT
Current price
£64.49
Exc VAT
Original price
£110.44
-
Original price
£110.44
Original price
£110.44
Inc VAT
£92.03
Exc VAT
£110.44
-
£110.44
Current price
£92.03
Inc VAT
£92.03
-
£92.03
Exc VAT
Current price
£92.03
Exc VAT
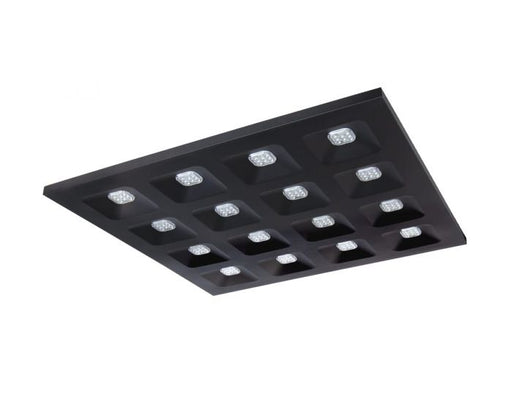
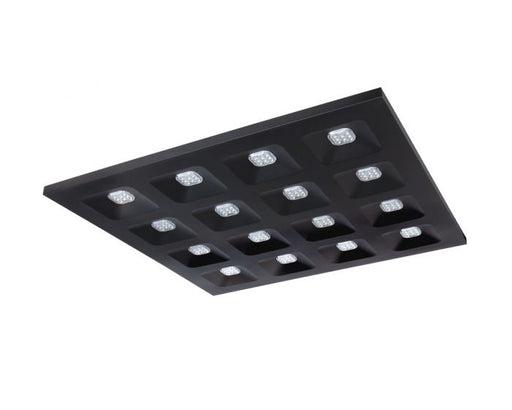
Collingwood DMB66N4K Domino CSP 600x600 Architectural LED Panel Black, Non-Dimmable, 4000K, 22-24-25-27W
Availability:
Dispatch in 1-2 Days
Collingwood DMB66N4K Domino CSP 600x600 Architectural LED Panel Black, Non-Dimmable, 4000K, 22-24-25-27W Product Description Ultra-low Glare 600x6...
View full details
Original price
£110.44
-
Original price
£110.44
Original price
£110.44
Inc VAT
£92.03
Exc VAT
£110.44
-
£110.44
Current price
£92.03
Inc VAT
£92.03
-
£92.03
Exc VAT
Current price
£92.03
Exc VAT
Original price
£104.25
-
Original price
£104.25
Original price
£104.25
Inc VAT
£86.88
Exc VAT
£104.25
-
£104.25
Current price
£86.88
Inc VAT
£86.88
-
£86.88
Exc VAT
Current price
£86.88
Exc VAT
Collingwood DMB66X4K Domino CSP 600x600 Architectural LED Panel Black, Driver-less, 4000K, 27W
Availability:
Dispatch in 1-2 Days
Collingwood DMB66X4K Domino CSP 600x600 Architectural LED Panel Black, Driver-less, 4000K, 27W Product Description Ultra-low Glare 600x600 Archite...
View full details
Original price
£104.25
-
Original price
£104.25
Original price
£104.25
Inc VAT
£86.88
Exc VAT
£104.25
-
£104.25
Current price
£86.88
Inc VAT
£86.88
-
£86.88
Exc VAT
Current price
£86.88
Exc VAT
Original price
£110.44
-
Original price
£110.44
Original price
£110.44
Inc VAT
£92.03
Exc VAT
£110.44
-
£110.44
Current price
£92.03
Inc VAT
£92.03
-
£92.03
Exc VAT
Current price
£92.03
Exc VAT
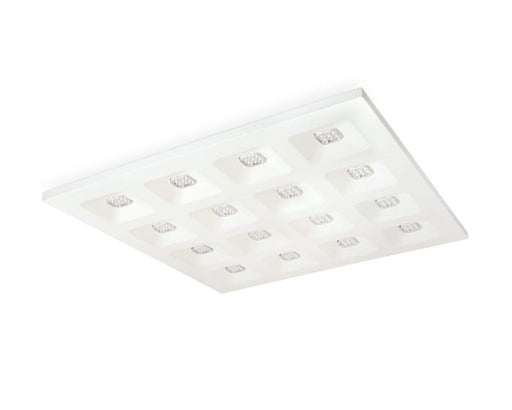
Collingwood DMW66N4K Domino CSP 600x600 Architectural LED Panel White, Non-Dimmable, 4000K, 22-24-25-27W
Availability:
Dispatch in 1-2 Days
Collingwood DMW66N4K Domino CSP 600x600 Architectural LED Panel White, Non-Dimmable, 4000K, 22-24-25-27W Product Description Ultra-low Glare 600x6...
View full details
Original price
£110.44
-
Original price
£110.44
Original price
£110.44
Inc VAT
£92.03
Exc VAT
£110.44
-
£110.44
Current price
£92.03
Inc VAT
£92.03
-
£92.03
Exc VAT
Current price
£92.03
Exc VAT

Original price
£104.25
-
Original price
£104.25
Original price
£104.25
Inc VAT
£86.88
Exc VAT
£104.25
-
£104.25
Current price
£86.88
Inc VAT
£86.88
-
£86.88
Exc VAT
Current price
£86.88
Exc VAT
Collingwood DMW66X4K Domino CSP 600x600 Architectural LED Panel White, Driver-less, 4000K, 27W
Availability:
Dispatch in 1-2 Days
Collingwood DMW66X4K Domino CSP 600x600 Architectural LED Panel White, Driver-less, 4000K, 27W Product Description Ultra-low Glare 600x600 Archite...
View full details
Original price
£104.25
-
Original price
£104.25
Original price
£104.25
Inc VAT
£86.88
Exc VAT
£104.25
-
£104.25
Current price
£86.88
Inc VAT
£86.88
-
£86.88
Exc VAT
Current price
£86.88
Exc VAT

Original price
£16.49
-
Original price
£16.49
Original price
£16.49
Inc VAT
£13.74
Exc VAT
£16.49
-
£16.49
Current price
£13.74
Inc VAT
£13.74
-
£13.74
Exc VAT
Current price
£13.74
Exc VAT
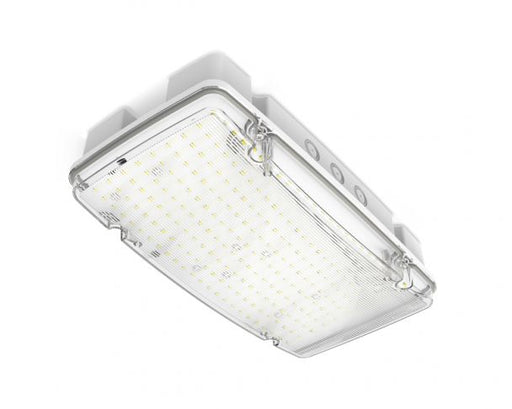
Collingwood EMBH145M Salvus Emergency Bulkhead IP65 3W 6500K 145lm Manual-Test
Availability:
Dispatch in 1-2 Days
Collingwood EMBH145M Salvus Emergency Bulkhead IP65 3W 6500K 145lm Manual-Test Product Description Collingwood's range of emergency bulkheads cont...
View full details
Original price
£16.49
-
Original price
£16.49
Original price
£16.49
Inc VAT
£13.74
Exc VAT
£16.49
-
£16.49
Current price
£13.74
Inc VAT
£13.74
-
£13.74
Exc VAT
Current price
£13.74
Exc VAT

Original price
£28.41
-
Original price
£28.41
Original price
£28.41
Inc VAT
£23.68
Exc VAT
£28.41
-
£28.41
Current price
£23.68
Inc VAT
£23.68
-
£23.68
Exc VAT
Current price
£23.68
Exc VAT
Collingwood EMBH145S Salvus Emergency Bulkhead IP65 3W 6500K 145lm Self-Test
Availability:
Dispatch in 1-2 Days
Collingwood EMBH145S Salvus Emergency Bulkhead IP65 3W 6500K 145lm Self-Test Product Description Collingwood's range of emergency bulkheads contai...
View full details
Original price
£28.41
-
Original price
£28.41
Original price
£28.41
Inc VAT
£23.68
Exc VAT
£28.41
-
£28.41
Current price
£23.68
Inc VAT
£23.68
-
£23.68
Exc VAT
Current price
£23.68
Exc VAT
Original price
£44.34
-
Original price
£44.34
Original price
£44.34
Inc VAT
£36.95
Exc VAT
£44.34
-
£44.34
Current price
£36.95
Inc VAT
£36.95
-
£36.95
Exc VAT
Current price
£36.95
Exc VAT
Collingwood EMBL30M Salvus Emergency Exit Blade IP20 4W 6500K 50lm Manual-Test
Availability:
Dispatch in 1-2 Days
Collingwood EMBL30M Salvus Emergency Exit Blade IP20 4W 6500K 50lm Manual-Test Product Description Collingwood's range of emergency blades contain...
View full details
Original price
£44.34
-
Original price
£44.34
Original price
£44.34
Inc VAT
£36.95
Exc VAT
£44.34
-
£44.34
Current price
£36.95
Inc VAT
£36.95
-
£36.95
Exc VAT
Current price
£36.95
Exc VAT

Original price
£54.42
-
Original price
£54.42
Original price
£54.42
Inc VAT
£45.35
Exc VAT
£54.42
-
£54.42
Current price
£45.35
Inc VAT
£45.35
-
£45.35
Exc VAT
Current price
£45.35
Exc VAT
Collingwood EMBL30S Salvus Emergency Exit Blade IP20 4W 6500K 50lm Self-Test
Availability:
Dispatch in 1-2 Days
Collingwood EMBL30S Salvus Emergency Exit Blade IP20 4W 6500K 50lm Self-Test Product Description Collingwood's range of emergency blades contain t...
View full details
Original price
£54.42
-
Original price
£54.42
Original price
£54.42
Inc VAT
£45.35
Exc VAT
£54.42
-
£54.42
Current price
£45.35
Inc VAT
£45.35
-
£45.35
Exc VAT
Current price
£45.35
Exc VAT
Original price
£2.09
-
Original price
£2.09
Original price
£2.09
Inc VAT
£1.74
Exc VAT
£2.09
-
£2.09
Current price
£1.74
Inc VAT
£1.74
-
£1.74
Exc VAT
Current price
£1.74
Exc VAT
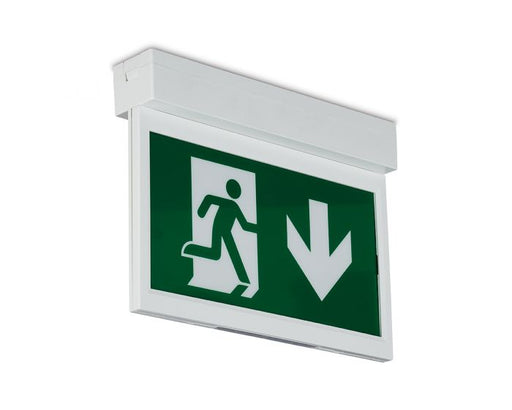
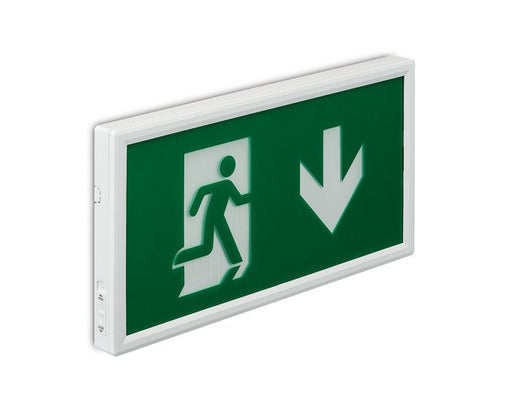
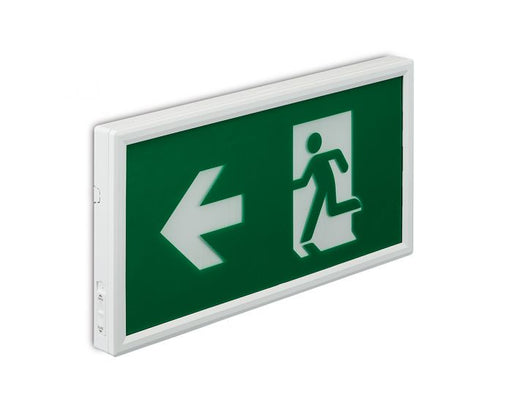
Collingwood EMBLDO Running Man Legend Down Facing Arrow for Salvus Emergency Exit Blade
Availability:
Dispatch in 1-2 Days
Collingwood EMBLDO Running Man Legend Down Facing Arrow for Salvus Emergency Exit Blade Features & Benefits Comes as an PVC label for ease of...
View full details
Original price
£2.09
-
Original price
£2.09
Original price
£2.09
Inc VAT
£1.74
Exc VAT
£2.09
-
£2.09
Current price
£1.74
Inc VAT
£1.74
-
£1.74
Exc VAT
Current price
£1.74
Exc VAT

Original price
£2.09
-
Original price
£2.09
Original price
£2.09
Inc VAT
£1.74
Exc VAT
£2.09
-
£2.09
Current price
£1.74
Inc VAT
£1.74
-
£1.74
Exc VAT
Current price
£1.74
Exc VAT
Collingwood EMBLLE Running Man Legend Left Facing Arrow for Salvus Emergency Exit Blade
Availability:
Dispatch in 1-2 Days
Collingwood EMBLLE Running Man Legend Left Facing Arrow for Salvus Emergency Exit Blade Features & Benefits Comes as an PVC label for ease of...
View full details
Original price
£2.09
-
Original price
£2.09
Original price
£2.09
Inc VAT
£1.74
Exc VAT
£2.09
-
£2.09
Current price
£1.74
Inc VAT
£1.74
-
£1.74
Exc VAT
Current price
£1.74
Exc VAT

Original price
£2.09
-
Original price
£2.09
Original price
£2.09
Inc VAT
£1.74
Exc VAT
£2.09
-
£2.09
Current price
£1.74
Inc VAT
£1.74
-
£1.74
Exc VAT
Current price
£1.74
Exc VAT
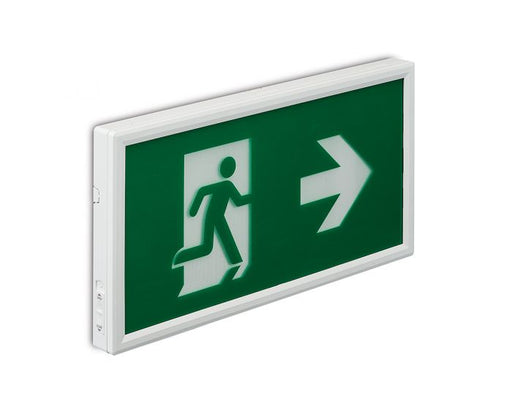
Collingwood EMBLRI Running Man Legend Right Facing Arrow for Salvus Emergency Exit Blade
Availability:
Dispatch in 1-2 Days
Collingwood EMBLRI Running Man Legend Right Facing Arrow for Salvus Emergency Exit Blade Features & Benefits Comes as an PVC label for ease o...
View full details
Original price
£2.09
-
Original price
£2.09
Original price
£2.09
Inc VAT
£1.74
Exc VAT
£2.09
-
£2.09
Current price
£1.74
Inc VAT
£1.74
-
£1.74
Exc VAT
Current price
£1.74
Exc VAT
Original price
£5.49
-
Original price
£5.49
Original price
£5.49
Inc VAT
£4.58
Exc VAT
£5.49
-
£5.49
Current price
£4.58
Inc VAT
£4.58
-
£4.58
Exc VAT
Current price
£4.58
Exc VAT
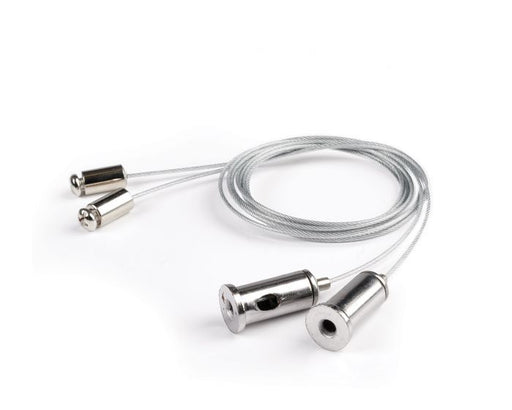
Collingwood EMBLSK Salvus Emergency Exit Blade Suspension Kit
Availability:
Dispatch in 1-2 Days
Collingwood EMBLSK Salvus Emergency Exit Blade Suspension Kit Features & Benefits 1m steel cable with fixings Complying with ISO 3864-1, and ...
View full details
Original price
£5.49
-
Original price
£5.49
Original price
£5.49
Inc VAT
£4.58
Exc VAT
£5.49
-
£5.49
Current price
£4.58
Inc VAT
£4.58
-
£4.58
Exc VAT
Current price
£4.58
Exc VAT

Original price
£2.09
-
Original price
£2.09
Original price
£2.09
Inc VAT
£1.74
Exc VAT
£2.09
-
£2.09
Current price
£1.74
Inc VAT
£1.74
-
£1.74
Exc VAT
Current price
£1.74
Exc VAT
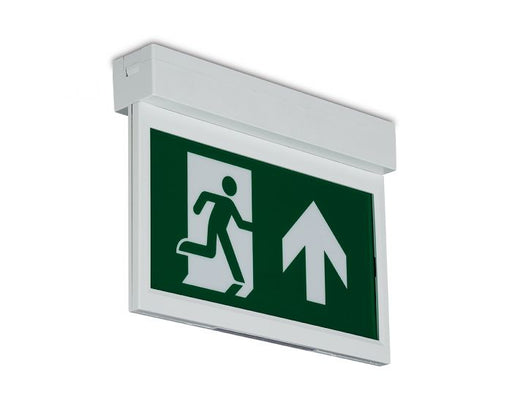
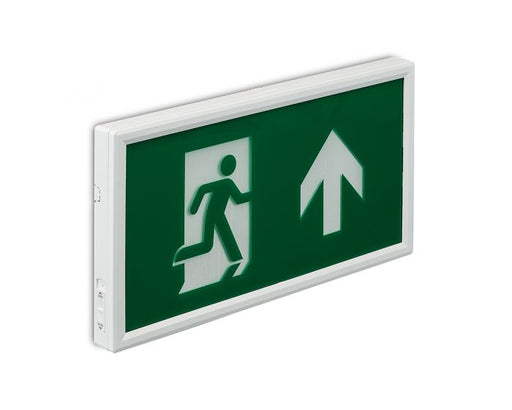
Collingwood EMBLUP Running Man Legend Up Facing Arrow for Salvus Emergency Exit Blade
Availability:
Dispatch in 1-2 Days
Collingwood EMBLUP Running Man Legend Up Facing Arrow for Salvus Emergency Exit Blade Features & Benefits Comes as an PVC label for ease of i...
View full details
Original price
£2.09
-
Original price
£2.09
Original price
£2.09
Inc VAT
£1.74
Exc VAT
£2.09
-
£2.09
Current price
£1.74
Inc VAT
£1.74
-
£1.74
Exc VAT
Current price
£1.74
Exc VAT
Original price
£98.99
-
Original price
£98.99
Original price
£98.99
Inc VAT
£82.49
Exc VAT
£98.99
-
£98.99
Current price
£82.49
Inc VAT
£82.49
-
£82.49
Exc VAT
Current price
£82.49
Exc VAT
Collingwood EMBMAX Salvus Max High Output Emergency Bulkhead Manual Test, 6-10W, IP66
Availability:
Dispatch in 1-2 Days
Collingwood EMBMAX Salvus Max High Output Emergency Bulkhead Manual Test, 6-10W, IP66 Product Description Salvus max is the perfect solution for a...
View full details
Original price
£98.99
-
Original price
£98.99
Original price
£98.99
Inc VAT
£82.49
Exc VAT
£98.99
-
£98.99
Current price
£82.49
Inc VAT
£82.49
-
£82.49
Exc VAT
Current price
£82.49
Exc VAT
Original price
£43.58
-
Original price
£43.58
Original price
£43.58
Inc VAT
£36.32
Exc VAT
£43.58
-
£43.58
Current price
£36.32
Inc VAT
£36.32
-
£36.32
Exc VAT
Current price
£36.32
Exc VAT
Collingwood EMBOLTMCOR Salvus Emergency Bolt on M20 Manual Test Corridor
Availability:
Dispatch in 1-2 Days
Collingwood EMBOLTMCOR Salvus Emergency Bolt on M20 Manual Test Corridor Product Description Taking just 4 minutes to fit via the M20 interface o...
View full details
Original price
£43.58
-
Original price
£43.58
Original price
£43.58
Inc VAT
£36.32
Exc VAT
£43.58
-
£43.58
Current price
£36.32
Inc VAT
£36.32
-
£36.32
Exc VAT
Current price
£36.32
Exc VAT

Original price
£43.58
-
Original price
£43.58
Original price
£43.58
Inc VAT
£36.32
Exc VAT
£43.58
-
£43.58
Current price
£36.32
Inc VAT
£36.32
-
£36.32
Exc VAT
Current price
£36.32
Exc VAT
Collingwood EMBOLTMOPEN Salvus Emergency Bolt on M20 Manual Test Open Area
Availability:
Dispatch in 1-2 Days
Collingwood EMBOLTMOPEN Salvus Emergency Bolt on M20 Manual Test Open Area Product Description Taking just 4 minutes to fit via the M20 interface...
View full details
Original price
£43.58
-
Original price
£43.58
Original price
£43.58
Inc VAT
£36.32
Exc VAT
£43.58
-
£43.58
Current price
£36.32
Inc VAT
£36.32
-
£36.32
Exc VAT
Current price
£36.32
Exc VAT

Original price
£52.29
-
Original price
£52.29
Original price
£52.29
Inc VAT
£43.58
Exc VAT
£52.29
-
£52.29
Current price
£43.58
Inc VAT
£43.58
-
£43.58
Exc VAT
Current price
£43.58
Exc VAT
Collingwood EMBOLTSCOR Salvus Emergency Bolt on M20 Self Test Corridor
Availability:
Dispatch in 1-2 Days
Collingwood EMBOLTSCOR Salvus Emergency Bolt on M20 Self Test Corridor Product Description Taking just 4 minutes to fit via the M20 interface of ...
View full details
Original price
£52.29
-
Original price
£52.29
Original price
£52.29
Inc VAT
£43.58
Exc VAT
£52.29
-
£52.29
Current price
£43.58
Inc VAT
£43.58
-
£43.58
Exc VAT
Current price
£43.58
Exc VAT
Original price
£52.29
-
Original price
£52.29
Original price
£52.29
Inc VAT
£43.58
Exc VAT
£52.29
-
£52.29
Current price
£43.58
Inc VAT
£43.58
-
£43.58
Exc VAT
Current price
£43.58
Exc VAT
Collingwood EMBOLTSOPEN Salvus Emergency Bolt on M20 Self Test Open Area
Availability:
Dispatch in 1-2 Days
Collingwood EMBOLTSOPEN Salvus Emergency Bolt on M20 Self Test Open Area Product Description Taking just 4 minutes to fit via the M20 interface o...
View full details
Original price
£52.29
-
Original price
£52.29
Original price
£52.29
Inc VAT
£43.58
Exc VAT
£52.29
-
£52.29
Current price
£43.58
Inc VAT
£43.58
-
£43.58
Exc VAT
Current price
£43.58
Exc VAT

Original price
£38.31
-
Original price
£38.31
Original price
£38.31
Inc VAT
£31.93
Exc VAT
£38.31
-
£38.31
Current price
£31.93
Inc VAT
£31.93
-
£31.93
Exc VAT
Current price
£31.93
Exc VAT
Collingwood EMBX35M Salvus Emergency Exit Box IP20 3.5W 6500K 50lm Manual-Test
Availability:
Dispatch in 1-2 Days
Collingwood EMBX35M Emergency Exit Box 50lm Viewing Distance 35m Manual Test. Product Description Collingwood's range of emergency boxes contain t...
View full details
Original price
£38.31
-
Original price
£38.31
Original price
£38.31
Inc VAT
£31.93
Exc VAT
£38.31
-
£38.31
Current price
£31.93
Inc VAT
£31.93
-
£31.93
Exc VAT
Current price
£31.93
Exc VAT
Original price
£48.37
-
Original price
£48.37
Original price
£48.37
Inc VAT
£40.31
Exc VAT
£48.37
-
£48.37
Current price
£40.31
Inc VAT
£40.31
-
£40.31
Exc VAT
Current price
£40.31
Exc VAT
Collingwood EMBX35S Salvus Emergency Exit Box IP20 3.5W 6500K 50lm Self-Test
Availability:
Dispatch in 1-2 Days
Collingwood EMBX35S Emergency Exit Box 50lm Viewing Distance 35m Self Test. Product Description Collingwood's range of emergency boxes contain the...
View full details
Original price
£48.37
-
Original price
£48.37
Original price
£48.37
Inc VAT
£40.31
Exc VAT
£48.37
-
£48.37
Current price
£40.31
Inc VAT
£40.31
-
£40.31
Exc VAT
Current price
£40.31
Exc VAT
Original price
£2.09
-
Original price
£2.09
Original price
£2.09
Inc VAT
£1.74
Exc VAT
£2.09
-
£2.09
Current price
£1.74
Inc VAT
£1.74
-
£1.74
Exc VAT
Current price
£1.74
Exc VAT
Collingwood EMBXDO Running Man Legend Down Facing Arrow for Salvus Emergency Exit Box
Availability:
Dispatch in 1-2 Days
Collingwood EMBXDO Running Man Legend Down Facing Arrow for Salvus Emergency Exit Box Features & Benefits Comes as an PVC label for ease of i...
View full details
Original price
£2.09
-
Original price
£2.09
Original price
£2.09
Inc VAT
£1.74
Exc VAT
£2.09
-
£2.09
Current price
£1.74
Inc VAT
£1.74
-
£1.74
Exc VAT
Current price
£1.74
Exc VAT
Original price
£2.09
-
Original price
£2.09
Original price
£2.09
Inc VAT
£1.74
Exc VAT
£2.09
-
£2.09
Current price
£1.74
Inc VAT
£1.74
-
£1.74
Exc VAT
Current price
£1.74
Exc VAT
Collingwood EMBXLE Running Man Legend Left Facing Arrow for Salvus Emergency Exit Box
Availability:
Dispatch in 1-2 Days
Collingwood EMBXLE Running Man Legend Left Facing Arrow for Salvus Emergency Exit Box Features & Benefits Comes as an PVC label for ease of i...
View full details
Original price
£2.09
-
Original price
£2.09
Original price
£2.09
Inc VAT
£1.74
Exc VAT
£2.09
-
£2.09
Current price
£1.74
Inc VAT
£1.74
-
£1.74
Exc VAT
Current price
£1.74
Exc VAT

Original price
£2.09
-
Original price
£2.09
Original price
£2.09
Inc VAT
£1.74
Exc VAT
£2.09
-
£2.09
Current price
£1.74
Inc VAT
£1.74
-
£1.74
Exc VAT
Current price
£1.74
Exc VAT
Collingwood EMBXRI Running Man Legend Right Facing Arrow for Salvus Emergency Exit Box
Availability:
Dispatch in 1-2 Days
Collingwood EMBXRI Running Man Legend Right Facing Arrow for Salvus Emergency Exit Box Features & Benefits Comes as an PVC label for ease of ...
View full details
Original price
£2.09
-
Original price
£2.09
Original price
£2.09
Inc VAT
£1.74
Exc VAT
£2.09
-
£2.09
Current price
£1.74
Inc VAT
£1.74
-
£1.74
Exc VAT
Current price
£1.74
Exc VAT
Original price
£2.09
-
Original price
£2.09
Original price
£2.09
Inc VAT
£1.74
Exc VAT
£2.09
-
£2.09
Current price
£1.74
Inc VAT
£1.74
-
£1.74
Exc VAT
Current price
£1.74
Exc VAT
Collingwood EMBXUP Running Man Legend Up Facing Arrow for Salvus Emergency Exit Box
Availability:
Dispatch in 1-2 Days
Collingwood EMBXUP Running Man Legend Up Facing Arrow for Salvus Emergency Exit Box Features & Benefits Comes as an PVC label for ease of ins...
View full details
Original price
£2.09
-
Original price
£2.09
Original price
£2.09
Inc VAT
£1.74
Exc VAT
£2.09
-
£2.09
Current price
£1.74
Inc VAT
£1.74
-
£1.74
Exc VAT
Current price
£1.74
Exc VAT

Original price
£48.16
-
Original price
£48.16
Original price
£48.16
Inc VAT
£40.13
Exc VAT
£48.16
-
£48.16
Current price
£40.13
Inc VAT
£40.13
-
£40.13
Exc VAT
Current price
£40.13
Exc VAT
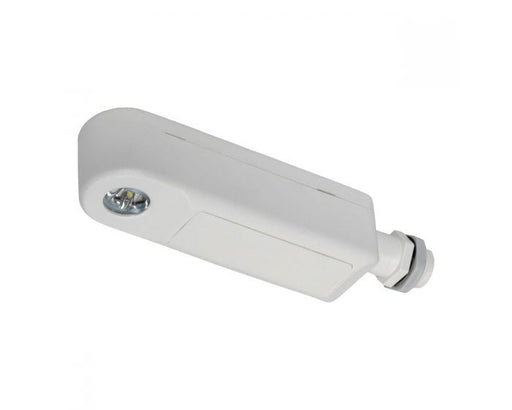
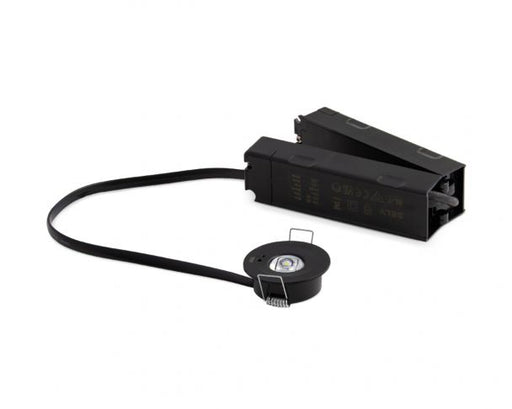
Collingwood EMRBMAN Salvus Route Emergency Spot 1W 6500K Black, Manual-Test, Open Corridor Lens
Availability:
Dispatch in 1-2 Days
Collingwood EMRBMAN Salvus Route Emergency Spot 1W 6500K Black, Manual-Test, Open Corridor Lens Product Description Collingwood's new range of eme...
View full details
Original price
£48.16
-
Original price
£48.16
Original price
£48.16
Inc VAT
£40.13
Exc VAT
£48.16
-
£48.16
Current price
£40.13
Inc VAT
£40.13
-
£40.13
Exc VAT
Current price
£40.13
Exc VAT
Original price
£63.56
-
Original price
£63.56
Original price
£63.56
Inc VAT
£52.97
Exc VAT
£63.56
-
£63.56
Current price
£52.97
Inc VAT
£52.97
-
£52.97
Exc VAT
Current price
£52.97
Exc VAT
Collingwood EMRBST Salvus Route Emergency Spot 1W 6500K Black, Self-Test, Open Corridor Lens
Availability:
Dispatch in 1-2 Days
Collingwood EMRBST Salvus Route Emergency Spot 1W 6500K Black, Self-Test, Open Corridor Lens Product Description Collingwood's new range of emerge...
View full details
Original price
£63.56
-
Original price
£63.56
Original price
£63.56
Inc VAT
£52.97
Exc VAT
£63.56
-
£63.56
Current price
£52.97
Inc VAT
£52.97
-
£52.97
Exc VAT
Current price
£52.97
Exc VAT

Original price
£48.16
-
Original price
£48.16
Original price
£48.16
Inc VAT
£40.13
Exc VAT
£48.16
-
£48.16
Current price
£40.13
Inc VAT
£40.13
-
£40.13
Exc VAT
Current price
£40.13
Exc VAT
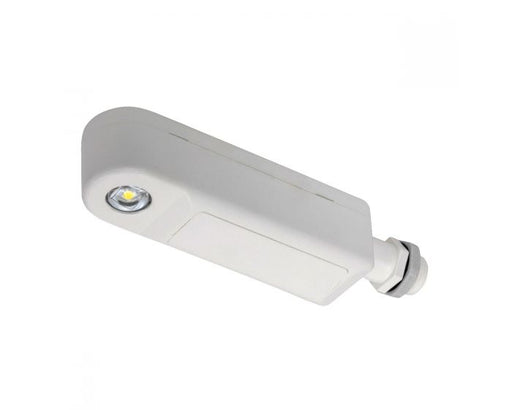
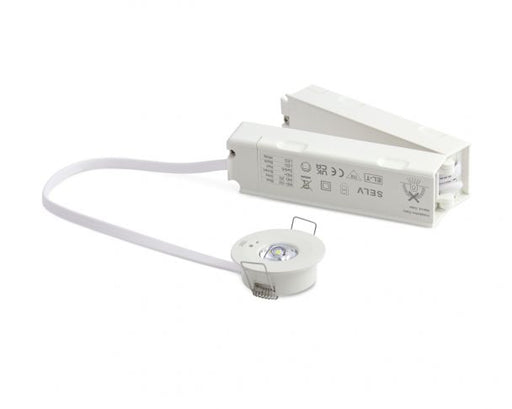
Collingwood EMRWMAN Salvus Route Emergency Spot 1W 6500K White, Manual-Test, Open Corridor Lens
Availability:
Dispatch in 1-2 Days
Collingwood EMRWMAN Salvus Route Emergency Spot 1W 6500K White, Manual-Test, Open Corridor Lens Product Description Collingwood's new range of eme...
View full details
Original price
£48.16
-
Original price
£48.16
Original price
£48.16
Inc VAT
£40.13
Exc VAT
£48.16
-
£48.16
Current price
£40.13
Inc VAT
£40.13
-
£40.13
Exc VAT
Current price
£40.13
Exc VAT
Original price
£63.56
-
Original price
£63.56
Original price
£63.56
Inc VAT
£52.97
Exc VAT
£63.56
-
£63.56
Current price
£52.97
Inc VAT
£52.97
-
£52.97
Exc VAT
Current price
£52.97
Exc VAT
Collingwood EMRWST Salvus Route Emergency Spot 1W 6500K White, Self-Test, Open Corridor Lens
Availability:
Dispatch in 1-2 Days
Collingwood EMRWST Salvus Route Emergency Spot 1W 6500K White, Self-Test, Open Corridor Lens Product Description Collingwood's new range of emerge...
View full details
Original price
£63.56
-
Original price
£63.56
Original price
£63.56
Inc VAT
£52.97
Exc VAT
£63.56
-
£63.56
Current price
£52.97
Inc VAT
£52.97
-
£52.97
Exc VAT
Current price
£52.97
Exc VAT
Original price
£131.57
-
Original price
£131.57
Original price
£131.57
Inc VAT
£109.64
Exc VAT
£131.57
-
£131.57
Current price
£109.64
Inc VAT
£109.64
-
£109.64
Exc VAT
Current price
£109.64
Exc VAT
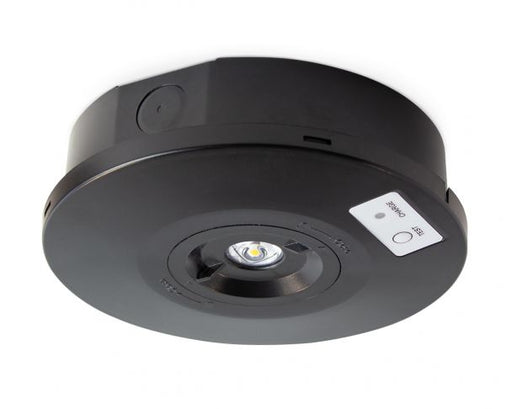
Collingwood EMSBRDEM Salvus Surface Emergency Spot 2W 6500K Round Black, Manual-Test, Open Corridor
Availability:
Dispatch in 1-2 Days
Collingwood EMSBRDEM Salvus Surface Emergency Spot 2W 6500K Round Black, Manual-Test, Open Corridor Product Description Collingwood's new emergenc...
View full details
Original price
£131.57
-
Original price
£131.57
Original price
£131.57
Inc VAT
£109.64
Exc VAT
£131.57
-
£131.57
Current price
£109.64
Inc VAT
£109.64
-
£109.64
Exc VAT
Current price
£109.64
Exc VAT
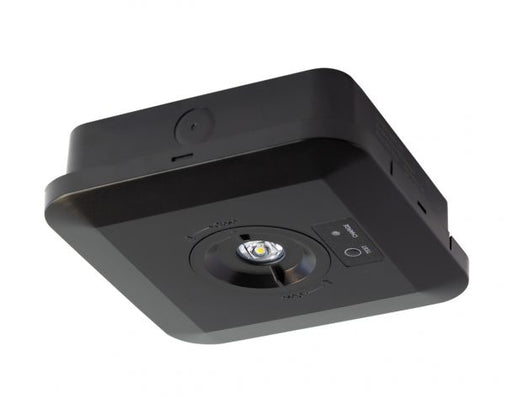 Collingwood EMSBSQEM Salvus Surface Emergency Spot 2W 6500K Square Black, Manual-Test, Open Corridor
Original price
£131.57
-
Original price
£131.57
Original price
£131.57
Inc VAT
£109.64
Exc VAT
£131.57
-
£131.57
Current price
£109.64
Inc VAT
£109.64
-
£109.64
Exc VAT
Current price
£109.64
Exc VAT
Collingwood EMSBSQEM Salvus Surface Emergency Spot 2W 6500K Square Black, Manual-Test, Open Corridor
Availability:
Dispatch in 1-2 Days
Collingwood EMSBSQEM Salvus Surface Emergency Spot 2W 6500K Square Black, Manual-Test, Open Corridor Product Description Collingwood's new emergen...
View full details
Original price
£131.57
-
Original price
£131.57
Original price
£131.57
Inc VAT
£109.64
Exc VAT
£131.57
-
£131.57
Current price
£109.64
Inc VAT
£109.64
-
£109.64
Exc VAT
Current price
£109.64
Exc VAT

Original price
£131.57
-
Original price
£131.57
Original price
£131.57
Inc VAT
£109.64
Exc VAT
£131.57
-
£131.57
Current price
£109.64
Inc VAT
£109.64
-
£109.64
Exc VAT
Current price
£109.64
Exc VAT
Collingwood EMSWRDEM Salvus Surface Emergency Spot 2W 6500K Round White, Manual-Test, Open Corridor
Availability:
Dispatch in 1-2 Days
Collingwood EMSWRDEM Salvus Surface Emergency Spot 2W 6500K Round White, Manual-Test, Open Corridor Product Description Collingwood's new emergenc...
View full details
Original price
£131.57
-
Original price
£131.57
Original price
£131.57
Inc VAT
£109.64
Exc VAT
£131.57
-
£131.57
Current price
£109.64
Inc VAT
£109.64
-
£109.64
Exc VAT
Current price
£109.64
Exc VAT
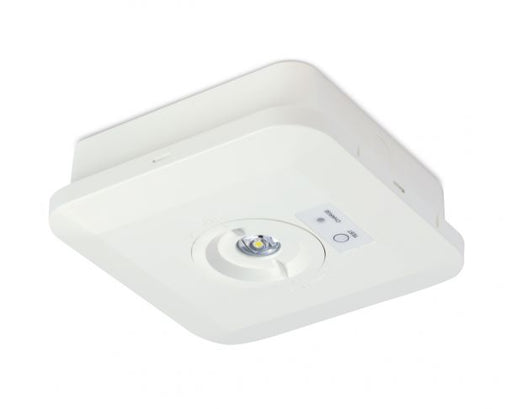 Collingwood EMSWSQEM Salvus Surface Emergency Spot 2W 6500K Square White, Manual-Test, Open Corridor
Original price
£131.57
-
Original price
£131.57
Original price
£131.57
Inc VAT
£109.64
Exc VAT
£131.57
-
£131.57
Current price
£109.64
Inc VAT
£109.64
-
£109.64
Exc VAT
Current price
£109.64
Exc VAT
Collingwood EMSWSQEM Salvus Surface Emergency Spot 2W 6500K Square White, Manual-Test, Open Corridor
Availability:
Dispatch in 1-2 Days
Collingwood EMSWSQEM Salvus Surface Emergency Spot 2W 6500K Square White, Manual-Test, Open Corridor Product Description Collingwood's new emergen...
View full details
Original price
£131.57
-
Original price
£131.57
Original price
£131.57
Inc VAT
£109.64
Exc VAT
£131.57
-
£131.57
Current price
£109.64
Inc VAT
£109.64
-
£109.64
Exc VAT
Current price
£109.64
Exc VAT
Original price
£74.57
-
Original price
£74.57
Original price
£74.57
Inc VAT
£62.14
Exc VAT
£74.57
-
£74.57
Current price
£62.14
Inc VAT
£62.14
-
£62.14
Exc VAT
Current price
£62.14
Exc VAT
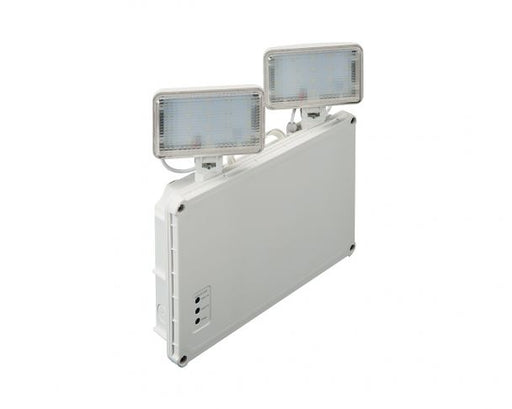
Collingwood EMTW400S Salvus Emergency Twin Spot IP65 4.8W 6500K 400lm Self-Test
Availability:
Dispatch in 1-2 Days
Collingwood EMTW400S Salvus Emergency Twin Spot IP65 4.8W 6500K 400lm Self-Test Product Description Collingwood's emergency twin spot contains the...
View full details
Original price
£74.57
-
Original price
£74.57
Original price
£74.57
Inc VAT
£62.14
Exc VAT
£74.57
-
£74.57
Current price
£62.14
Inc VAT
£62.14
-
£62.14
Exc VAT
Current price
£62.14
Exc VAT
Original price
£17.49
-
Original price
£17.49
Original price
£17.49
Inc VAT
£14.58
Exc VAT
£17.49
-
£17.49
Current price
£14.58
Inc VAT
£14.58
-
£14.58
Exc VAT
Current price
£14.58
Exc VAT
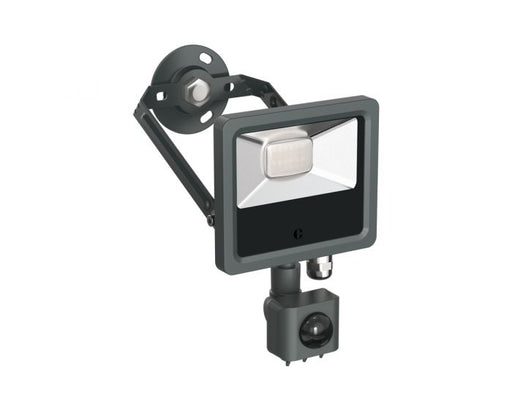
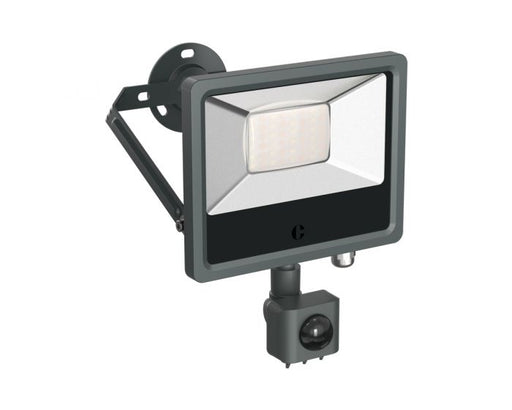
Collingwood FL01APCS Anthracite 10W Colour Switchable Floodlight, PIR
Availability:
Dispatch in 1-2 Days
Collingwood FL01APCS Anthracite 10W Colour Switchable Floodlight, PIR With a wide 120° beam angle and a unique 360° rotation, this 10W flicker-fr...
View full details
Original price
£17.49
-
Original price
£17.49
Original price
£17.49
Inc VAT
£14.58
Exc VAT
£17.49
-
£17.49
Current price
£14.58
Inc VAT
£14.58
-
£14.58
Exc VAT
Current price
£14.58
Exc VAT
Original price
£11.95
-
Original price
£11.95
Original price
£11.95
Inc VAT
£9.96
Exc VAT
£11.95
-
£11.95
Current price
£9.96
Inc VAT
£9.96
-
£9.96
Exc VAT
Current price
£9.96
Exc VAT
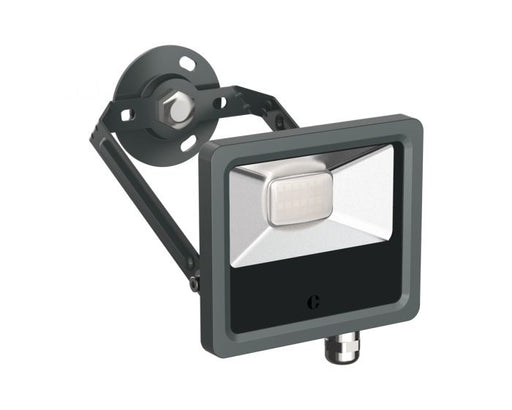
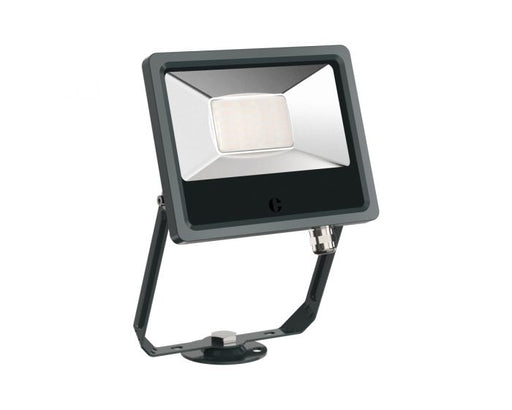
Collingwood FL01AXCS Anthracite 10W Colour Switchable Floodlight, Standard
Availability:
Dispatch in 1-2 Days
Collingwood FL01AXCS Anthracite 10W Colour Switchable Floodlight, Standard With a wide 120° beam angle and a unique 360° rotation, this 10W flick...
View full details
Original price
£11.95
-
Original price
£11.95
Original price
£11.95
Inc VAT
£9.96
Exc VAT
£11.95
-
£11.95
Current price
£9.96
Inc VAT
£9.96
-
£9.96
Exc VAT
Current price
£9.96
Exc VAT
Original price
£17.49
Original price
£17.49
-
Original price
£17.49
Original price
£17.49
Current price
£14.99
Inc VAT
Current price
£12.49
Exc VAT
£14.99
-
£14.99
Current price
£12.49
Inc VAT
£12.49
-
£12.49
Exc VAT
Current price
£12.49
Exc VAT
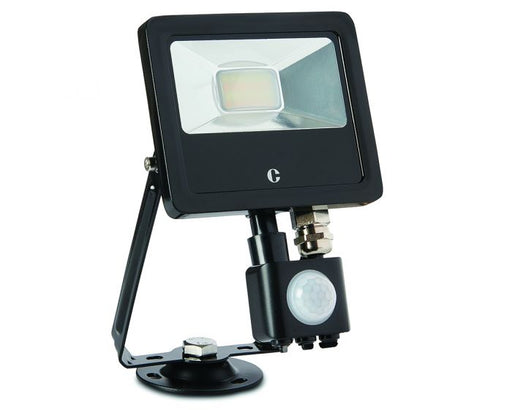
Collingwood FL01BPCS Black 10W Colour Switchable Floodlight, IP65, PIR
Availability:
IN STOCK
Collingwood FL01BPCS Black 10W Colour Switchable Floodlight, IP65, PIR With a wide 120° beam angle and a unique 360° rotation, this 10W flicker-f...
View full details
Original price
£17.49
Original price
£17.49
-
Original price
£17.49
Original price
£17.49
Current price
£14.99
Inc VAT
Current price
£12.49
Exc VAT
£14.99
-
£14.99
Current price
£12.49
Inc VAT
£12.49
-
£12.49
Exc VAT
Current price
£12.49
Exc VAT
Original price
£12.95
Original price
£12.95
-
Original price
£12.95
Original price
£12.95
Current price
£9.99
Inc VAT
Current price
£8.33
Exc VAT
£9.99
-
£9.99
Current price
£8.33
Inc VAT
£8.33
-
£8.33
Exc VAT
Current price
£8.33
Exc VAT
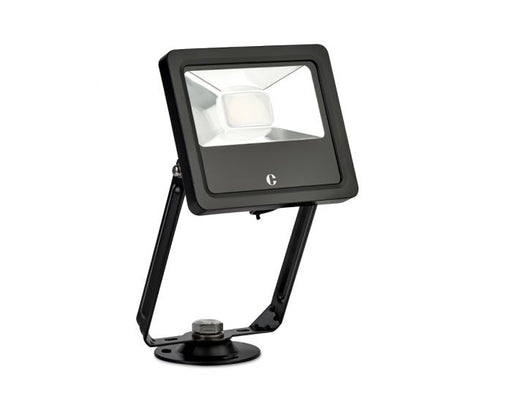
Collingwood FL01BXCS Black 10W Colour Switchable Floodlight, IP65, Standard
Availability:
IN STOCK
Collingwood FL01BXCS Black 10W Colour Switchable Floodlight, IP65, Standard With a wide 120° beam angle and a unique 360° rotation, this 10W flic...
View full details
Original price
£12.95
Original price
£12.95
-
Original price
£12.95
Original price
£12.95
Current price
£9.99
Inc VAT
Current price
£8.33
Exc VAT
£9.99
-
£9.99
Current price
£8.33
Inc VAT
£8.33
-
£8.33
Exc VAT
Current price
£8.33
Exc VAT
Original price
£17.49
-
Original price
£17.49
Original price
£17.49
Inc VAT
£14.58
Exc VAT
£17.49
-
£17.49
Current price
£14.58
Inc VAT
£14.58
-
£14.58
Exc VAT
Current price
£14.58
Exc VAT
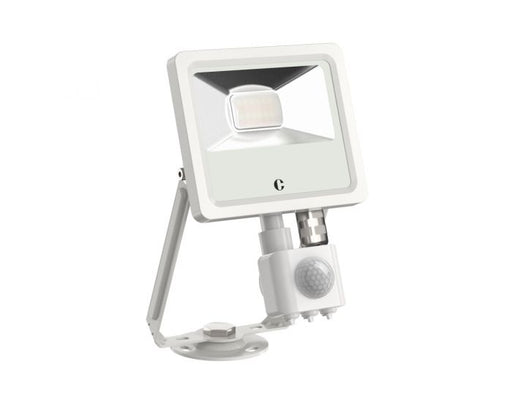
Collingwood FL01WPCS White 10W Colour Switchable Floodlight, IP65, PIR
Availability:
Dispatch in 1-2 Days
Collingwood FL01WPCS White 10W Colour Switchable Floodlight, IP65, PIR With a wide 120° beam angle and a unique 360° rotation, this 10W flicker-f...
View full details
Original price
£17.49
-
Original price
£17.49
Original price
£17.49
Inc VAT
£14.58
Exc VAT
£17.49
-
£17.49
Current price
£14.58
Inc VAT
£14.58
-
£14.58
Exc VAT
Current price
£14.58
Exc VAT
Original price
£11.95
-
Original price
£11.95
Original price
£11.95
Inc VAT
£9.96
Exc VAT
£11.95
-
£11.95
Current price
£9.96
Inc VAT
£9.96
-
£9.96
Exc VAT
Current price
£9.96
Exc VAT
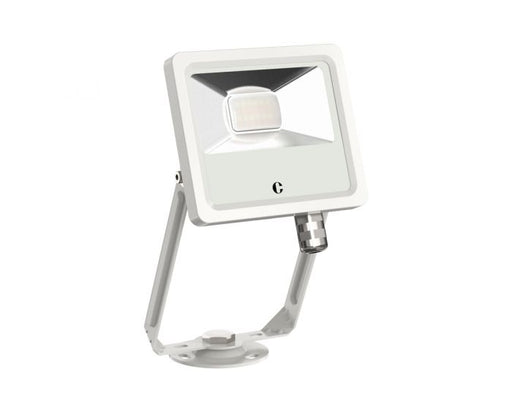
Collingwood FL01WXCS White 10W Colour Switchable Floodlight, Standard
Availability:
Dispatch in 1-2 Days
Collingwood FL01WXCS White 10W Colour Switchable Floodlight, Standard With a wide 120° beam angle and a unique 360° rotation, this 10W flicker-fr...
View full details
Original price
£11.95
-
Original price
£11.95
Original price
£11.95
Inc VAT
£9.96
Exc VAT
£11.95
-
£11.95
Current price
£9.96
Inc VAT
£9.96
-
£9.96
Exc VAT
Current price
£9.96
Exc VAT
Original price
£23.99
-
Original price
£23.99
Original price
£23.99
Inc VAT
£19.99
Exc VAT
£23.99
-
£23.99
Current price
£19.99
Inc VAT
£19.99
-
£19.99
Exc VAT
Current price
£19.99
Exc VAT
Collingwood FL02APCS Anthracite 20W Colour Switchable Floodlight, PIR
Availability:
IN STOCK
Collingwood FL02APCS Anthracite 20W Colour Switchable Floodlight, PIR With a wide 120° beam angle and a unique 360° rotation, this 20W flicker-fr...
View full details
Original price
£23.99
-
Original price
£23.99
Original price
£23.99
Inc VAT
£19.99
Exc VAT
£23.99
-
£23.99
Current price
£19.99
Inc VAT
£19.99
-
£19.99
Exc VAT
Current price
£19.99
Exc VAT
Original price
£20.99
-
Original price
£20.99
Original price
£20.99
Inc VAT
£17.49
Exc VAT
£20.99
-
£20.99
Current price
£17.49
Inc VAT
£17.49
-
£17.49
Exc VAT
Current price
£17.49
Exc VAT
Collingwood FL02AXCS Anthracite 20W Colour Switchable Floodlight, Standard
Availability:
Dispatch in 1-2 Days
Collingwood FL02AXCS Anthracite 20W Colour Switchable Floodlight, Standard With a wide 120° beam angle and a unique 360° rotation, this 20W flick...
View full details
Original price
£20.99
-
Original price
£20.99
Original price
£20.99
Inc VAT
£17.49
Exc VAT
£20.99
-
£20.99
Current price
£17.49
Inc VAT
£17.49
-
£17.49
Exc VAT
Current price
£17.49
Exc VAT