Products

Original price
£26.04
-
Original price
£26.04
Original price
£21.70
Exc VAT
£26.04
Inc VAT
£26.04
-
£26.04
Current price
£26.04
Inc VAT
£21.70
-
£21.70
Exc VAT
Current price
£26.04
Exc VAT

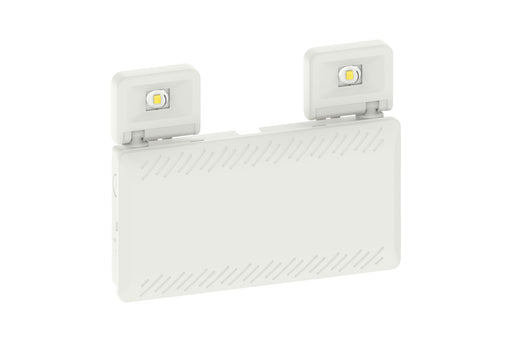
Integral ILEMTS036 Emergency Twinspot IP65 5W 500Lm Non-Maintained Manual Test 6000K
Availability:
Dispatch in 2-3 Days
Integral ILEMTS036 Emergency Twinspot IP65 5W 500Lm Non-Maintained Manual Test 6000K Product Description THIS ITEM IS NOW UPGRADED OR DISCONTINUED...
View full details
Original price
£26.04
-
Original price
£26.04
Original price
£21.70
Exc VAT
£26.04
Inc VAT
£26.04
-
£26.04
Current price
£26.04
Inc VAT
£21.70
-
£21.70
Exc VAT
Current price
£26.04
Exc VAT
Original price
£26.71
-
Original price
£26.71
Original price
£22.26
Exc VAT
£26.71
Inc VAT
£26.71
-
£26.71
Current price
£26.71
Inc VAT
£22.26
-
£22.26
Exc VAT
Current price
£26.71
Exc VAT
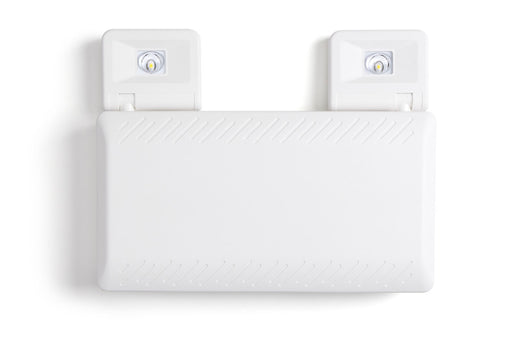
Integral ILEMTS037 Emergency Twinspot IP65 5W 500Lm Non-Maintained Self Test 6000K
Availability:
Dispatch in 2-3 Days
Integral ILEMTS037 Emergency Twinspot IP65 5W 500Lm Non-Maintained Self Test 6000K Key Features Attractive design IP65 Directional and adjustable...
View full details
Original price
£26.71
-
Original price
£26.71
Original price
£22.26
Exc VAT
£26.71
Inc VAT
£26.71
-
£26.71
Current price
£26.71
Inc VAT
£22.26
-
£22.26
Exc VAT
Current price
£26.71
Exc VAT
Original price
£47.33
-
Original price
£47.33
Original price
£39.44
Exc VAT
£47.33
Inc VAT
£47.33
-
£47.33
Current price
£47.33
Inc VAT
£39.44
-
£39.44
Exc VAT
Current price
£47.33
Exc VAT
Integral ILEMTS038 Emergency Twinspot 4W 500lm Non-Maintained IP65 6000K DALI
Availability:
Dispatch in 2-3 Days
Integral ILEMTS038 Emergency LED Twinspot – 4W 500lm, IP65, 6000K, DALI Product Overview The Integral ILEMTS038 Emergency Twinspot is ...
View full details
Original price
£47.33
-
Original price
£47.33
Original price
£39.44
Exc VAT
£47.33
Inc VAT
£47.33
-
£47.33
Current price
£47.33
Inc VAT
£39.44
-
£39.44
Exc VAT
Current price
£47.33
Exc VAT
Original price
£6.43
-
Original price
£6.43
Original price
£5.36
Exc VAT
£6.43
Inc VAT
£6.43
-
£6.43
Current price
£6.43
Inc VAT
£5.36
-
£5.36
Exc VAT
Current price
£6.43
Exc VAT
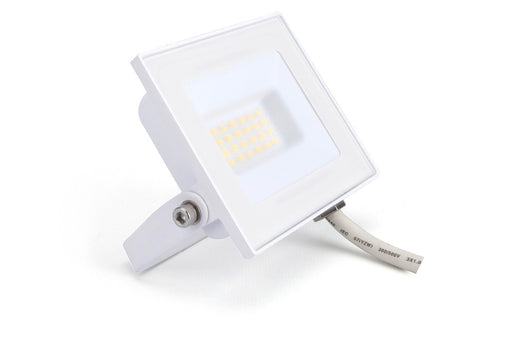
Integral ILFLE018 Compact Slim Floodlight 20W 2000Lm 4000K 120 Beam 100Lm/W IP65 IK08 White
Availability:
Dispatch in 2-3 Days
Integral ILFLE018 Compact Slim Floodlight 20W 2000Lm 4000K 120 Beam 100Lm/W IP65 IK08 White Product Description The Integral LED Compact Slim Flood...
View full details
Original price
£6.43
-
Original price
£6.43
Original price
£5.36
Exc VAT
£6.43
Inc VAT
£6.43
-
£6.43
Current price
£6.43
Inc VAT
£5.36
-
£5.36
Exc VAT
Current price
£6.43
Exc VAT
Original price
£11.44
-
Original price
£11.44
Original price
£9.53
Exc VAT
£11.44
Inc VAT
£11.44
-
£11.44
Current price
£11.44
Inc VAT
£9.53
-
£9.53
Exc VAT
Current price
£11.44
Exc VAT
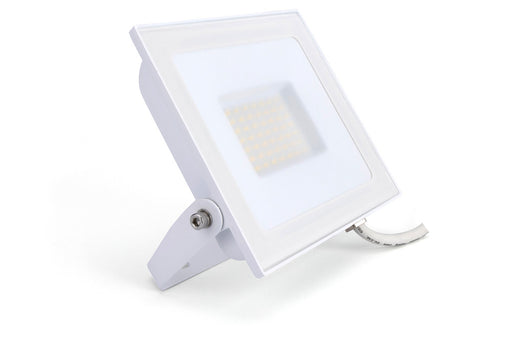
Integral ILFLE022 Compact Slim Floodlight 50W 5000Lm 4000K 120 Beam 100Lm/W IP65 IK08 White
Availability:
Dispatch in 2-3 Days
Integral ILFLE022 Compact Slim Floodlight 50W 5000Lm 4000K 120 Beam 100Lm/W IP65 IK08 White Product Description The Integral LED Compact Slim Flood...
View full details
Original price
£11.44
-
Original price
£11.44
Original price
£9.53
Exc VAT
£11.44
Inc VAT
£11.44
-
£11.44
Current price
£11.44
Inc VAT
£9.53
-
£9.53
Exc VAT
Current price
£11.44
Exc VAT
Original price
£12.42
-
Original price
£12.42
Original price
£10.35
Exc VAT
£12.42
Inc VAT
£12.42
-
£12.42
Current price
£12.42
Inc VAT
£10.35
-
£10.35
Exc VAT
Current price
£12.42
Exc VAT
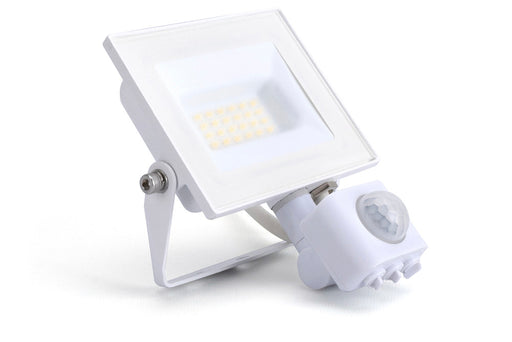
Integral ILFLE040 Compact Slim Floodlight PIR 20W 2000Lm 4000K 120 Beam 100Lm/W IP65 IK08 White
Availability:
Dispatch in 2-3 Days
Integral ILFLE040 Compact Slim Floodlight PIR 20W 2000Lm 4000K 120 Beam 100Lm/W IP65 IK08 White Product Description The Integral LED Compact Slim F...
View full details
Original price
£12.42
-
Original price
£12.42
Original price
£10.35
Exc VAT
£12.42
Inc VAT
£12.42
-
£12.42
Current price
£12.42
Inc VAT
£10.35
-
£10.35
Exc VAT
Current price
£12.42
Exc VAT
Original price
£18.07
-
Original price
£18.07
Original price
£15.06
Exc VAT
£18.07
Inc VAT
£18.07
-
£18.07
Current price
£18.07
Inc VAT
£15.06
-
£15.06
Exc VAT
Current price
£18.07
Exc VAT
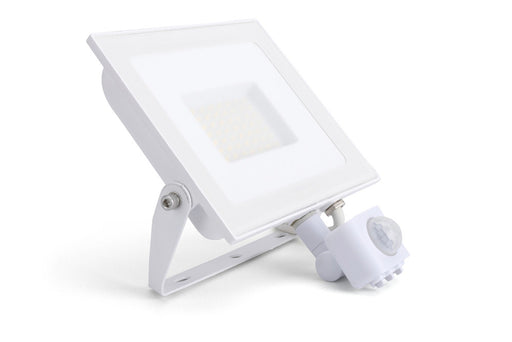
Integral ILFLE044 Compact Slim Floodlight PIR 50W 5000Lm 4000K 120 Beam 100Lm/W IP65 IK08 White
Availability:
Dispatch in 2-3 Days
Integral ILFLE044 Compact Slim Floodlight PIR 50W 5000Lm 4000K 120 Beam 100Lm/W IP65 IK08 White Product Description The Integral LED Compact Slim F...
View full details
Original price
£18.07
-
Original price
£18.07
Original price
£15.06
Exc VAT
£18.07
Inc VAT
£18.07
-
£18.07
Current price
£18.07
Inc VAT
£15.06
-
£15.06
Exc VAT
Current price
£18.07
Exc VAT

Original price
£25.22
-
Original price
£25.22
Original price
£21.02
Exc VAT
£25.22
Inc VAT
£25.22
-
£25.22
Current price
£25.22
Inc VAT
£21.02
-
£21.02
Exc VAT
Current price
£25.22
Exc VAT
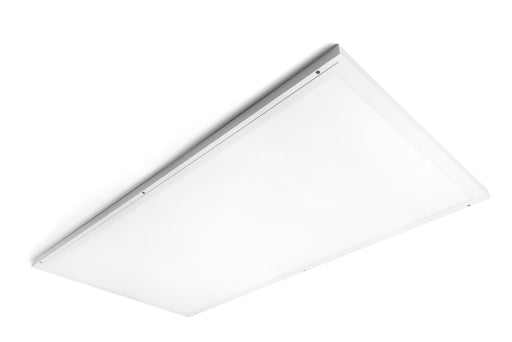
Integral ILP1230C004 Evo Surface LED Panel Light 1200X300 3600Lm 36W 4000K Backlit Non-Dimmable 100Lm/W 5Yr Warranty
Availability:
Dispatch in 2-3 Days
Integral ILP1230C004 Evo Surface LED Panel Light – 1200x300mm, 3600lm, 36W, 4000K Product Overview The Integral ILP1230C004 Evo Surface L...
View full details
Original price
£25.22
-
Original price
£25.22
Original price
£21.02
Exc VAT
£25.22
Inc VAT
£25.22
-
£25.22
Current price
£25.22
Inc VAT
£21.02
-
£21.02
Exc VAT
Current price
£25.22
Exc VAT
Original price
£37.18
-
Original price
£37.18
Original price
£30.98
Exc VAT
£37.18
Inc VAT
£37.18
-
£37.18
Current price
£37.18
Inc VAT
£30.98
-
£30.98
Exc VAT
Current price
£37.18
Exc VAT
Integral ILP1260C009 Evo Surface LED Panel Light 1200X600 5000Lm 50W 4000K Backlit Non-Dimmable 100Lm/W 5Yr Warranty
Availability:
Dispatch in 2-3 Days
Integral ILP1260C009 Evo Surface LED Panel Light – 1200x600mm, 5000lm, 50W, 4000K Product Overview The Integral ILP1260C009 Evo Surface L...
View full details
Original price
£37.18
-
Original price
£37.18
Original price
£30.98
Exc VAT
£37.18
Inc VAT
£37.18
-
£37.18
Current price
£37.18
Inc VAT
£30.98
-
£30.98
Exc VAT
Current price
£37.18
Exc VAT
Original price
£47.90
-
Original price
£47.90
Original price
£39.92
Exc VAT
£47.90
Inc VAT
£47.90
-
£47.90
Current price
£47.90
Inc VAT
£39.92
-
£39.92
Exc VAT
Current price
£47.90
Exc VAT
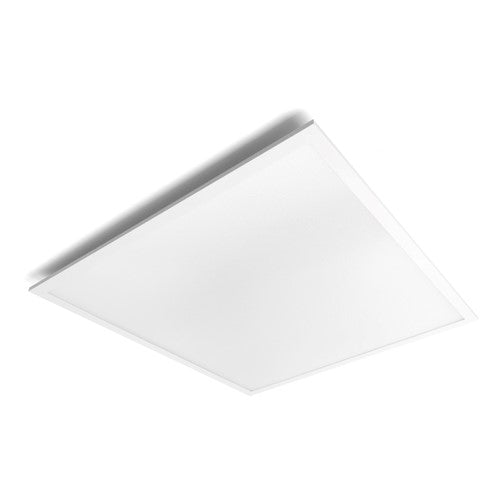
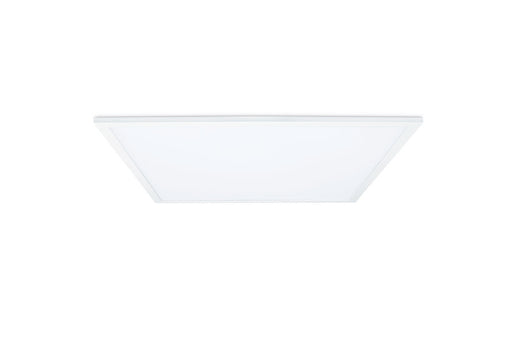
Integral ILP6060B039 Evo LED Panel Light 600X600 IP65 3300Lm 30W 4000K Backlit Non-Dimmable 110Lm/W
Availability:
Dispatch in 2-3 Days
Integral ILP6060B039 Evo LED Panel Light - 600x600mm, IP65, 3300lm, 30W, 4000K, Backlit, Non-Dimmable, 110lm/W Product Overview Introducing the Int...
View full details
Original price
£47.90
-
Original price
£47.90
Original price
£39.92
Exc VAT
£47.90
Inc VAT
£47.90
-
£47.90
Current price
£47.90
Inc VAT
£39.92
-
£39.92
Exc VAT
Current price
£47.90
Exc VAT

Original price
£38.40
Original price
£38.40
-
Original price
£38.40
Original price
£38.40
Current price
£19.82
Exc VAT
Current price
£23.78
Inc VAT
£23.78
-
£23.78
Current price
£23.78
Inc VAT
£19.82
-
£19.82
Exc VAT
Current price
£23.78
Exc VAT
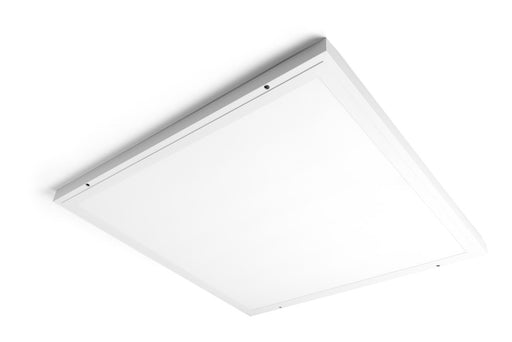
Integral ILP6060B060 High Lumen Performance+ LED Panel 600X600 3750-6800Lm 21-42W 4000K Tpa Backlit Non-Dimmable 170Lm/W
Availability:
Dispatch in 2-3 Days
Integral ILP6060B060 High Lumen Performance+ LED Panel 600x600 3750-6800Lm 21-42W 4000K TPa Backlit Non-Dimmable 170Lm/W Product Overview Introduci...
View full details
Original price
£38.40
Original price
£38.40
-
Original price
£38.40
Original price
£38.40
Current price
£19.82
Exc VAT
Current price
£23.78
Inc VAT
£23.78
-
£23.78
Current price
£23.78
Inc VAT
£19.82
-
£19.82
Exc VAT
Current price
£23.78
Exc VAT
Original price
£39.60
-
Original price
£39.60
Original price
£33.00
Exc VAT
£39.60
Inc VAT
£39.60
-
£39.60
Current price
£39.60
Inc VAT
£33.00
-
£33.00
Exc VAT
Current price
£39.60
Exc VAT
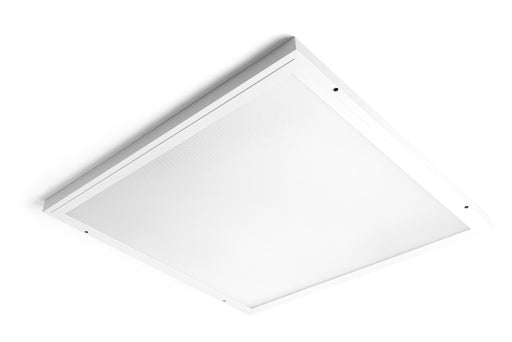
Integral ILP6060B062 High Lumen Performance+ LED Panel 600X600 3750-6800Lm 21-42W 4000K Tpa Ugr<19 Backlit Non-Dimmable 170Lm/W
Availability:
Dispatch in 2-3 Days
Integral ILP6060B062 High Lumen Performance+ LED Panel 600x600 3750-6800Lm 21-42W 4000K Tpa UGR<19 Backlit Non-Dimmable 170Lm/W Product Overview...
View full details
Original price
£39.60
-
Original price
£39.60
Original price
£33.00
Exc VAT
£39.60
Inc VAT
£39.60
-
£39.60
Current price
£39.60
Inc VAT
£33.00
-
£33.00
Exc VAT
Current price
£39.60
Exc VAT
Original price
£23.04
-
Original price
£23.04
Original price
£19.20
Exc VAT
£23.04
Inc VAT
£23.04
-
£23.04
Current price
£23.04
Inc VAT
£19.20
-
£19.20
Exc VAT
Current price
£23.04
Exc VAT
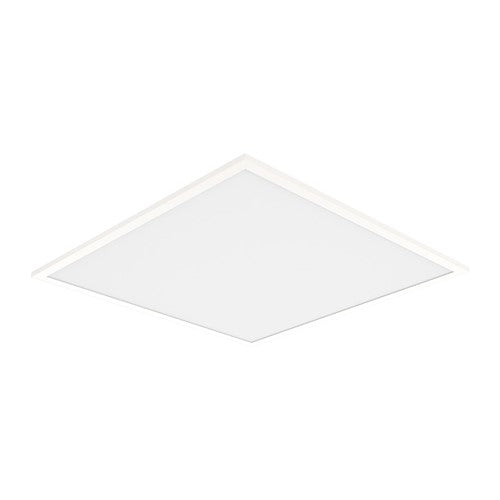
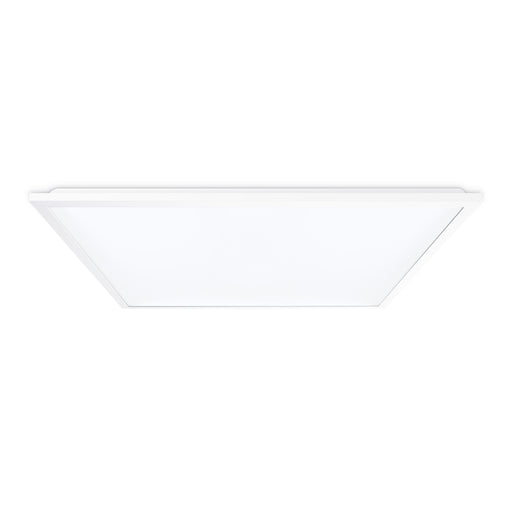
Integral ILP6060C033 Evo Surface LED Panel Light 600X600 3600lm 33W 4000K Backlit Non-Dimmable 109Lm/W 5Yr Warranty
Availability:
Dispatch in 2-3 Days
Integral ILP6060C033 Evo Surface LED Panel Light – 600x600mm, 3600lm, 33W, 4000K Product Overview The Integral ILP6060C033 Evo Surface...
View full details
Original price
£23.04
-
Original price
£23.04
Original price
£19.20
Exc VAT
£23.04
Inc VAT
£23.04
-
£23.04
Current price
£23.04
Inc VAT
£19.20
-
£19.20
Exc VAT
Current price
£23.04
Exc VAT
Original price
£26.17
-
Original price
£26.17
Original price
£21.81
Exc VAT
£26.17
Inc VAT
£26.17
-
£26.17
Current price
£26.17
Inc VAT
£21.81
-
£21.81
Exc VAT
Current price
£26.17
Exc VAT
Integral ILP6060C035 Evo Surface LED Panel Light 600X600 3600lm 36W 4000K TPa UGR<19 Backlit Non-Dimmable 100 Lm/W 5Yr Warranty
Availability:
Dispatch in 2-3 Days
Integral ILP6060C035 Evo Surface LED Panel Light – 600x600mm, 3600lm, 36W, 4000K, UGR <19 Product Overview The Integral ILP6060C035...
View full details
Original price
£26.17
-
Original price
£26.17
Original price
£21.81
Exc VAT
£26.17
Inc VAT
£26.17
-
£26.17
Current price
£26.17
Inc VAT
£21.81
-
£21.81
Exc VAT
Current price
£26.17
Exc VAT

Original price
£33.56
Original price
£33.56
-
Original price
£33.56
Original price
£33.56
Current price
£14.83
Exc VAT
Current price
£17.79
Inc VAT
£17.79
-
£17.79
Current price
£17.79
Inc VAT
£14.83
-
£14.83
Exc VAT
Current price
£17.79
Exc VAT
Integral ILP6060D001 Evo Frame LED Panel 600X600 Power & CCT Switchable 30/36/40W 3000/3600/4000Lm 3000K/4000K/6000K 100Lm/W IP20 IK02 Non-Dimmable
Availability:
IN STOCK
Integral ILP6060D001 Evo Frame LED Panel 600x600 - Power & CCT Switchable 30/36/40W Product Overview Transform your retail, hospitality, and of...
View full details
Original price
£33.56
Original price
£33.56
-
Original price
£33.56
Original price
£33.56
Current price
£14.83
Exc VAT
Current price
£17.79
Inc VAT
£17.79
-
£17.79
Current price
£17.79
Inc VAT
£14.83
-
£14.83
Exc VAT
Current price
£17.79
Exc VAT
Original price
£85.13
-
Original price
£85.13
Original price
£70.94
Exc VAT
£85.13
Inc VAT
£85.13
-
£85.13
Current price
£85.13
Inc VAT
£70.94
-
£70.94
Exc VAT
Current price
£85.13
Exc VAT
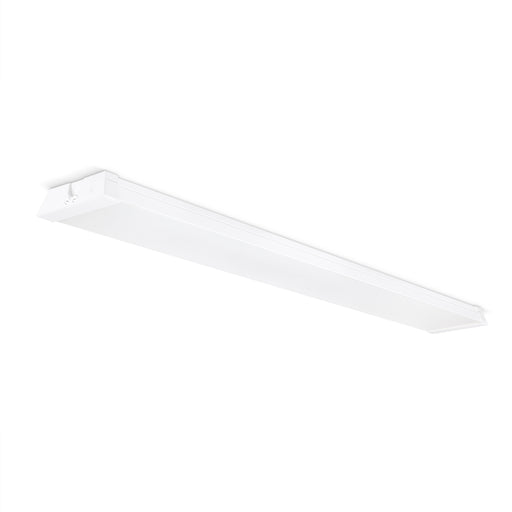
JCC JC030031 Commercial Linear UGR 19 4FT 22W/25W/28W/31W 3CCT
Availability:
Dispatch in 2-3 Days
JCC JC030031 Commercial Linear UGR 19 4FT 22W/25W/28W/31W 3CCT Product Description UGR <19 as standard, designed to comply with BS EN 12464-1 li...
View full details
Original price
£85.13
-
Original price
£85.13
Original price
£70.94
Exc VAT
£85.13
Inc VAT
£85.13
-
£85.13
Current price
£85.13
Inc VAT
£70.94
-
£70.94
Exc VAT
Current price
£85.13
Exc VAT

Original price
£127.73
-
Original price
£127.73
Original price
£106.44
Exc VAT
£127.73
Inc VAT
£127.73
-
£127.73
Current price
£127.73
Inc VAT
£106.44
-
£106.44
Exc VAT
Current price
£127.73
Exc VAT
JCC JC030032 Commercial Linear UGR19 4FT 24W/27W/30W/33W 3CCT Self-test Emergency
Availability:
Dispatch in 2-3 Days
JCC JC030032 Commercial Linear UGR19 4FT 24W/27W/30W/33W 3CCT Self-test Emergency Product Description UGR <19 as standard, designed to comply wi...
View full details
Original price
£127.73
-
Original price
£127.73
Original price
£106.44
Exc VAT
£127.73
Inc VAT
£127.73
-
£127.73
Current price
£127.73
Inc VAT
£106.44
-
£106.44
Exc VAT
Current price
£127.73
Exc VAT

Original price
£127.73
-
Original price
£127.73
Original price
£106.44
Exc VAT
£127.73
Inc VAT
£127.73
-
£127.73
Current price
£127.73
Inc VAT
£106.44
-
£106.44
Exc VAT
Current price
£127.73
Exc VAT
JCC JC030033 Commercial Linear UGR19 4FT 22W/25W/28W/31W 3CCT DALI
Availability:
Dispatch in 2-3 Days
JCC JC030033 Commercial Linear UGR19 4FT 22W/25W/28W/31W 3CCT DALI Product Description UGR <19 as standard, designed to comply with BS EN 12464-...
View full details
Original price
£127.73
-
Original price
£127.73
Original price
£106.44
Exc VAT
£127.73
Inc VAT
£127.73
-
£127.73
Current price
£127.73
Inc VAT
£106.44
-
£106.44
Exc VAT
Current price
£127.73
Exc VAT

Original price
£170.33
-
Original price
£170.33
Original price
£141.94
Exc VAT
£170.33
Inc VAT
£170.33
-
£170.33
Current price
£170.33
Inc VAT
£141.94
-
£141.94
Exc VAT
Current price
£170.33
Exc VAT
JCC JC030034 Commercial Linear UGR19 4FT 24W/27W/30W/33W 3CCT DALI Self-test Emergency
Availability:
Dispatch in 2-3 Days
JCC JC030034 Commercial Linear UGR19 4FT 24W/27W/30W/33W 3CCT DALI Self-test Emergency Product Description UGR <19 as standard, designed to comp...
View full details
Original price
£170.33
-
Original price
£170.33
Original price
£141.94
Exc VAT
£170.33
Inc VAT
£170.33
-
£170.33
Current price
£170.33
Inc VAT
£141.94
-
£141.94
Exc VAT
Current price
£170.33
Exc VAT

Original price
£100.33
-
Original price
£100.33
Original price
£83.61
Exc VAT
£100.33
Inc VAT
£100.33
-
£100.33
Current price
£100.33
Inc VAT
£83.61
-
£83.61
Exc VAT
Current price
£100.33
Exc VAT
JCC JC030037 Commercial Linear UGR19 4FT 22W/25W/28W/31W 3CCT Microwave On/Off
Availability:
Dispatch in 2-3 Days
JCC JC030037 Commercial Linear UGR19 4FT 22W/25W/28W/31W 3CCT Microwave On/Off Product Description UGR <19 as standard, designed to comply with ...
View full details
Original price
£100.33
-
Original price
£100.33
Original price
£83.61
Exc VAT
£100.33
Inc VAT
£100.33
-
£100.33
Current price
£100.33
Inc VAT
£83.61
-
£83.61
Exc VAT
Current price
£100.33
Exc VAT

Original price
£142.93
-
Original price
£142.93
Original price
£119.11
Exc VAT
£142.93
Inc VAT
£142.93
-
£142.93
Current price
£142.93
Inc VAT
£119.11
-
£119.11
Exc VAT
Current price
£142.93
Exc VAT
JCC JC030038 Commercial Linear UGR19 4FT 24W/27W/30W/33W 3CCT Microwave On/Off Self-test Em
Availability:
Dispatch in 2-3 Days
JCC JC030038 Commercial Linear UGR19 4FT 24W/27W/30W/33W 3CCT Microwave On/Off Self-test Em Product Description UGR <19 as standard, designed to...
View full details
Original price
£142.93
-
Original price
£142.93
Original price
£119.11
Exc VAT
£142.93
Inc VAT
£142.93
-
£142.93
Current price
£142.93
Inc VAT
£119.11
-
£119.11
Exc VAT
Current price
£142.93
Exc VAT

Original price
£92.23
-
Original price
£92.23
Original price
£76.86
Exc VAT
£92.23
Inc VAT
£92.23
-
£92.23
Current price
£92.23
Inc VAT
£76.86
-
£76.86
Exc VAT
Current price
£92.23
Exc VAT
JCC JC030041 Commercial Linear UGR19 5FT 30W/32W/34W/36W 3CCT
Availability:
Dispatch in 2-3 Days
JCC JC030041 Commercial Linear UGR19 5FT 30W/32W/34W/36W 3CCT Product Description UGR <19 as standard, designed to comply with BS EN 12464-1 lig...
View full details
Original price
£92.23
-
Original price
£92.23
Original price
£76.86
Exc VAT
£92.23
Inc VAT
£92.23
-
£92.23
Current price
£92.23
Inc VAT
£76.86
-
£76.86
Exc VAT
Current price
£92.23
Exc VAT

Original price
£134.83
-
Original price
£134.83
Original price
£112.36
Exc VAT
£134.83
Inc VAT
£134.83
-
£134.83
Current price
£134.83
Inc VAT
£112.36
-
£112.36
Exc VAT
Current price
£134.83
Exc VAT
JCC JC030042 Commercial Linear UGR19 5FT 32W/34W/36W/38W 3CCT Self-test Emergency
Availability:
Dispatch in 2-3 Days
JCC JC030042 Commercial Linear UGR19 5FT 32W/34W/36W/38W 3CCT Self-test Emergency Product Description UGR <19 as standard, designed to comply wi...
View full details
Original price
£134.83
-
Original price
£134.83
Original price
£112.36
Exc VAT
£134.83
Inc VAT
£134.83
-
£134.83
Current price
£134.83
Inc VAT
£112.36
-
£112.36
Exc VAT
Current price
£134.83
Exc VAT

Original price
£134.83
-
Original price
£134.83
Original price
£112.36
Exc VAT
£134.83
Inc VAT
£134.83
-
£134.83
Current price
£134.83
Inc VAT
£112.36
-
£112.36
Exc VAT
Current price
£134.83
Exc VAT
JCC JC030043 Commercial Linear UGR19 5FT 30W/32W/34W/36W 3CCT DALI
Availability:
Dispatch in 2-3 Days
JCC JC030043 Commercial Linear UGR19 5FT 30W/32W/34W/36W 3CCT DALI Product Description UGR <19 as standard, designed to comply with BS EN 12464-...
View full details
Original price
£134.83
-
Original price
£134.83
Original price
£112.36
Exc VAT
£134.83
Inc VAT
£134.83
-
£134.83
Current price
£134.83
Inc VAT
£112.36
-
£112.36
Exc VAT
Current price
£134.83
Exc VAT

Original price
£177.43
-
Original price
£177.43
Original price
£147.86
Exc VAT
£177.43
Inc VAT
£177.43
-
£177.43
Current price
£177.43
Inc VAT
£147.86
-
£147.86
Exc VAT
Current price
£177.43
Exc VAT
JCC JC030044 Commercial Linear UGR19 5FT 32W/34W/36W/38W 3CCT DALI Self-test Emergency
Availability:
Dispatch in 2-3 Days
JCC JC030044 Commercial Linear UGR19 5FT 32W/34W/36W/38W 3CCT DALI Self-test Emergency Product Description UGR <19 as standard, designed to comp...
View full details
Original price
£177.43
-
Original price
£177.43
Original price
£147.86
Exc VAT
£177.43
Inc VAT
£177.43
-
£177.43
Current price
£177.43
Inc VAT
£147.86
-
£147.86
Exc VAT
Current price
£177.43
Exc VAT

Original price
£113.82
-
Original price
£113.82
Original price
£94.85
Exc VAT
£113.82
Inc VAT
£113.82
-
£113.82
Current price
£113.82
Inc VAT
£94.85
-
£94.85
Exc VAT
Current price
£113.82
Exc VAT
JCC JC030047 Commercial Linear UGR19 5FT 30W/32W/34W/36W 3CCT Microwave On/Off
Availability:
Dispatch in 2-3 Days
JCC JC030047 Commercial Linear UGR19 5FT 30W/32W/34W/36W 3CCT Microwave On/Off Product Description UGR <19 as standard, designed to comply with ...
View full details
Original price
£113.82
-
Original price
£113.82
Original price
£94.85
Exc VAT
£113.82
Inc VAT
£113.82
-
£113.82
Current price
£113.82
Inc VAT
£94.85
-
£94.85
Exc VAT
Current price
£113.82
Exc VAT

Original price
£156.42
-
Original price
£156.42
Original price
£130.35
Exc VAT
£156.42
Inc VAT
£156.42
-
£156.42
Current price
£156.42
Inc VAT
£130.35
-
£130.35
Exc VAT
Current price
£156.42
Exc VAT
JCC JC030048 Commercial Linear UGR19 5FT 32W/34W/36W/38W 3CCT Microwave On/Off Self-test Em
Availability:
Dispatch in 2-3 Days
JCC JC030048 Commercial Linear UGR19 5FT 32W/34W/36W/38 3CCT Microwave On/Off Self-test Em Product Description UGR <19 as standard, designed to ...
View full details
Original price
£156.42
-
Original price
£156.42
Original price
£130.35
Exc VAT
£156.42
Inc VAT
£156.42
-
£156.42
Current price
£156.42
Inc VAT
£130.35
-
£130.35
Exc VAT
Current price
£156.42
Exc VAT

Original price
£58.44
-
Original price
£58.44
Original price
£48.70
Exc VAT
£58.44
Inc VAT
£58.44
-
£58.44
Current price
£58.44
Inc VAT
£48.70
-
£48.70
Exc VAT
Current price
£58.44
Exc VAT
JCC JC030051 Commercial Linear 4FT 22W/25W/28W/31W 4000K
Availability:
Dispatch in 2-3 Days
JCC JC030051 Commercial Linear 4FT 22W/25W/28W/31W 4000K Product Description Four Wattage output selectable allowing you to choose between 22W, 25W...
View full details
Original price
£58.44
-
Original price
£58.44
Original price
£48.70
Exc VAT
£58.44
Inc VAT
£58.44
-
£58.44
Current price
£58.44
Inc VAT
£48.70
-
£48.70
Exc VAT
Current price
£58.44
Exc VAT

Original price
£102.32
-
Original price
£102.32
Original price
£85.27
Exc VAT
£102.32
Inc VAT
£102.32
-
£102.32
Current price
£102.32
Inc VAT
£85.27
-
£85.27
Exc VAT
Current price
£102.32
Exc VAT
JCC JC030052 Commercial Linear 4FT 24W/27W/30W/33W 4000K Self-test Emergency
Availability:
Dispatch in 2-3 Days
JCC JC030052 Commercial Linear 4FT 24W/27W/30W/33W 4000K Self-test Emergency Product Description Four Wattage output selectable allowing you to c...
View full details
Original price
£102.32
-
Original price
£102.32
Original price
£85.27
Exc VAT
£102.32
Inc VAT
£102.32
-
£102.32
Current price
£102.32
Inc VAT
£85.27
-
£85.27
Exc VAT
Current price
£102.32
Exc VAT

Original price
£102.32
-
Original price
£102.32
Original price
£85.27
Exc VAT
£102.32
Inc VAT
£102.32
-
£102.32
Current price
£102.32
Inc VAT
£85.27
-
£85.27
Exc VAT
Current price
£102.32
Exc VAT
JCC JC030053 Commercial Linear 4FT 22W/25W/28W/31W 4000K DALI
Availability:
Dispatch in 2-3 Days
JCC JC030053 Commercial Linear 4FT 22W/25W/28W/31W 4000K DALI Product Description Four Wattage output selectable allowing you to choose between 22W...
View full details
Original price
£102.32
-
Original price
£102.32
Original price
£85.27
Exc VAT
£102.32
Inc VAT
£102.32
-
£102.32
Current price
£102.32
Inc VAT
£85.27
-
£85.27
Exc VAT
Current price
£102.32
Exc VAT

Original price
£146.19
-
Original price
£146.19
Original price
£121.83
Exc VAT
£146.19
Inc VAT
£146.19
-
£146.19
Current price
£146.19
Inc VAT
£121.83
-
£121.83
Exc VAT
Current price
£146.19
Exc VAT
JCC JC030054 Commercial Linear 4FT 24W/27W/30W/33W 4000K DALI Self-test Emergency
Availability:
Dispatch in 2-3 Days
JCC JC030054 Commercial Linear 4FT 24W/27W/30W/33W 4000K DALI Self-test Emergency Product Description Four Wattage output selectable allowing you t...
View full details
Original price
£146.19
-
Original price
£146.19
Original price
£121.83
Exc VAT
£146.19
Inc VAT
£146.19
-
£146.19
Current price
£146.19
Inc VAT
£121.83
-
£121.83
Exc VAT
Current price
£146.19
Exc VAT

Original price
£96.35
-
Original price
£96.35
Original price
£80.29
Exc VAT
£96.35
Inc VAT
£96.35
-
£96.35
Current price
£96.35
Inc VAT
£80.29
-
£80.29
Exc VAT
Current price
£96.35
Exc VAT
JCC JC030057 Commercial Linear 4FT 22W/25W/28W/31W 4000K Microwave On/Off
Availability:
Dispatch in 2-3 Days
JCC JC030057 Commercial Linear 4FT 22W/25W/28W/31W 4000K Microwave On/Off Product Description Four Wattage output selectable allowing you to choose...
View full details
Original price
£96.35
-
Original price
£96.35
Original price
£80.29
Exc VAT
£96.35
Inc VAT
£96.35
-
£96.35
Current price
£96.35
Inc VAT
£80.29
-
£80.29
Exc VAT
Current price
£96.35
Exc VAT

Original price
£140.23
-
Original price
£140.23
Original price
£116.86
Exc VAT
£140.23
Inc VAT
£140.23
-
£140.23
Current price
£140.23
Inc VAT
£116.86
-
£116.86
Exc VAT
Current price
£140.23
Exc VAT
JCC JC030058 Commercial Linear 4FT 24W/27W/30W/33W 4000K Microwave On/Off Self-test Emergency
Availability:
Dispatch in 2-3 Days
JCC JC030058 Commercial Linear 4FT 24W/27W/30W/33W 4000K Microwave On/Off Self-test Emergency Product Description Four Wattage output selectable al...
View full details
Original price
£140.23
-
Original price
£140.23
Original price
£116.86
Exc VAT
£140.23
Inc VAT
£140.23
-
£140.23
Current price
£140.23
Inc VAT
£116.86
-
£116.86
Exc VAT
Current price
£140.23
Exc VAT

Original price
£65.75
-
Original price
£65.75
Original price
£54.79
Exc VAT
£65.75
Inc VAT
£65.75
-
£65.75
Current price
£65.75
Inc VAT
£54.79
-
£54.79
Exc VAT
Current price
£65.75
Exc VAT
JCC JC030061 Commercial Linear 5FT 30W/32W/34W/36W 4000K
Availability:
Dispatch in 2-3 Days
JCC JC030061 Commercial Linear 5FT 30W/32W/34W/36W 4000K Product Description Four Wattage output selectable allowing you to choose between 30W, 32W...
View full details
Original price
£65.75
-
Original price
£65.75
Original price
£54.79
Exc VAT
£65.75
Inc VAT
£65.75
-
£65.75
Current price
£65.75
Inc VAT
£54.79
-
£54.79
Exc VAT
Current price
£65.75
Exc VAT

Original price
£109.63
-
Original price
£109.63
Original price
£91.36
Exc VAT
£109.63
Inc VAT
£109.63
-
£109.63
Current price
£109.63
Inc VAT
£91.36
-
£91.36
Exc VAT
Current price
£109.63
Exc VAT
JCC JC030062 Commercial Linear 5FT 32W/34W/36W/38W 4000K Self-test Emergency
Availability:
Dispatch in 2-3 Days
JCC JC030062 Commercial Linear 5FT 32W/34W/36W/38W 4000K Self-test Emergency Product Description Four Wattage output selectable allowing you to cho...
View full details
Original price
£109.63
-
Original price
£109.63
Original price
£91.36
Exc VAT
£109.63
Inc VAT
£109.63
-
£109.63
Current price
£109.63
Inc VAT
£91.36
-
£91.36
Exc VAT
Current price
£109.63
Exc VAT

Original price
£109.63
-
Original price
£109.63
Original price
£91.36
Exc VAT
£109.63
Inc VAT
£109.63
-
£109.63
Current price
£109.63
Inc VAT
£91.36
-
£91.36
Exc VAT
Current price
£109.63
Exc VAT
JCC JC030063 Commercial Linear 5FT 30W/32W/34W/36W 4000K DALI
Availability:
Dispatch in 2-3 Days
JCC JC030063 Commercial Linear 5FT 30W/32W/34W/36W 4000K DALI Product Description Four Wattage output selectable allowing you to choose between 30W...
View full details
Original price
£109.63
-
Original price
£109.63
Original price
£91.36
Exc VAT
£109.63
Inc VAT
£109.63
-
£109.63
Current price
£109.63
Inc VAT
£91.36
-
£91.36
Exc VAT
Current price
£109.63
Exc VAT

Original price
£153.51
-
Original price
£153.51
Original price
£127.93
Exc VAT
£153.51
Inc VAT
£153.51
-
£153.51
Current price
£153.51
Inc VAT
£127.93
-
£127.93
Exc VAT
Current price
£153.51
Exc VAT
JCC JC030064 Commercial Linear 5FT 32W/34W/36W/38W 4000K DALI Self-test Emergency
Availability:
Dispatch in 2-3 Days
JCC JC030064 Commercial Linear 5FT 32W/34W/36W/38W 4000K DALI Self-test Emergency Product Description Four Wattage output selectable allowing you t...
View full details
Original price
£153.51
-
Original price
£153.51
Original price
£127.93
Exc VAT
£153.51
Inc VAT
£153.51
-
£153.51
Current price
£153.51
Inc VAT
£127.93
-
£127.93
Exc VAT
Current price
£153.51
Exc VAT

Original price
£109.49
-
Original price
£109.49
Original price
£91.24
Exc VAT
£109.49
Inc VAT
£109.49
-
£109.49
Current price
£109.49
Inc VAT
£91.24
-
£91.24
Exc VAT
Current price
£109.49
Exc VAT
JCC JC030067 Commercial Linear 5FT 30W/32W/34W/36W 4000K Microwave On/Off
Availability:
Dispatch in 2-3 Days
JCC JC030067 Commercial Linear 5FT 30W/32W/34W/36W 4000K Microwave On/Off Product Description Four Wattage output selectable allowing you to choose...
View full details
Original price
£109.49
-
Original price
£109.49
Original price
£91.24
Exc VAT
£109.49
Inc VAT
£109.49
-
£109.49
Current price
£109.49
Inc VAT
£91.24
-
£91.24
Exc VAT
Current price
£109.49
Exc VAT

Original price
£153.36
-
Original price
£153.36
Original price
£127.80
Exc VAT
£153.36
Inc VAT
£153.36
-
£153.36
Current price
£153.36
Inc VAT
£127.80
-
£127.80
Exc VAT
Current price
£153.36
Exc VAT
JCC JC030068 Commercial Linear 5FT 32W/34W/36W/38W 4000K Microwave On/Off Self-test Emergency
Availability:
Dispatch in 2-3 Days
JCC JC030068 Commercial Linear 5FT 32W/34W/36W/38W 4000K Microwave On/Off Self-test Emergency Product Description Four Wattage output selectable al...
View full details
Original price
£153.36
-
Original price
£153.36
Original price
£127.80
Exc VAT
£153.36
Inc VAT
£153.36
-
£153.36
Current price
£153.36
Inc VAT
£127.80
-
£127.80
Exc VAT
Current price
£153.36
Exc VAT

Original price
£70.93
-
Original price
£70.93
Original price
£59.11
Exc VAT
£70.93
Inc VAT
£70.93
-
£70.93
Current price
£70.93
Inc VAT
£59.11
-
£59.11
Exc VAT
Current price
£70.93
Exc VAT
JCC JC030072 Commercial Linear UGR19 4ft 22W/25W/28W/31W 4000K
Availability:
Dispatch in 2-3 Days
JCC JC030072 Commercial Linear UGR19 4ft 22W/25W/28W/31W 4000K Product Description Four Wattage output selectable allowing you to choose bet...
View full details
Original price
£70.93
-
Original price
£70.93
Original price
£59.11
Exc VAT
£70.93
Inc VAT
£70.93
-
£70.93
Current price
£70.93
Inc VAT
£59.11
-
£59.11
Exc VAT
Current price
£70.93
Exc VAT
Original price
£113.53
-
Original price
£113.53
Original price
£94.61
Exc VAT
£113.53
Inc VAT
£113.53
-
£113.53
Current price
£113.53
Inc VAT
£94.61
-
£94.61
Exc VAT
Current price
£113.53
Exc VAT
JCC JC030073 Commercial Linear UGR19 4ft 24W/27W/30W/33W 4000K Self-test Emergency
Availability:
Dispatch in 2-3 Days
JCC JC030073 Commercial Linear UGR19 4ft 24W/27W/30W/33W 4000K Self-test Emergency Product Description Four Wattage output selectable allowin...
View full details
Original price
£113.53
-
Original price
£113.53
Original price
£94.61
Exc VAT
£113.53
Inc VAT
£113.53
-
£113.53
Current price
£113.53
Inc VAT
£94.61
-
£94.61
Exc VAT
Current price
£113.53
Exc VAT

Original price
£78.03
-
Original price
£78.03
Original price
£65.03
Exc VAT
£78.03
Inc VAT
£78.03
-
£78.03
Current price
£78.03
Inc VAT
£65.03
-
£65.03
Exc VAT
Current price
£78.03
Exc VAT
JCC JC030074 Commercial Linear UGR19 5ft 30W/32W/34W/36W 4000K
Availability:
Dispatch in 2-3 Days
JCC JC030074 Commercial Linear UGR19 5ft 30W/32W/34W/36W 4000K Product Description UGR <19 as standard, designed to comply with BS EN 124...
View full details
Original price
£78.03
-
Original price
£78.03
Original price
£65.03
Exc VAT
£78.03
Inc VAT
£78.03
-
£78.03
Current price
£78.03
Inc VAT
£65.03
-
£65.03
Exc VAT
Current price
£78.03
Exc VAT

Original price
£120.63
-
Original price
£120.63
Original price
£100.53
Exc VAT
£120.63
Inc VAT
£120.63
-
£120.63
Current price
£120.63
Inc VAT
£100.53
-
£100.53
Exc VAT
Current price
£120.63
Exc VAT
JCC JC030075 Commercial Linear UGR19 5ft 32W/34W/36W/38W 4000K Self-test Emergency
Availability:
Dispatch in 2-3 Days
JCC JC030075 Commercial Linear UGR19 5ft 32W/34W/36W/38W 4000K Self-test Emergency Product Description UGR <19 as standard, designed to co...
View full details
Original price
£120.63
-
Original price
£120.63
Original price
£100.53
Exc VAT
£120.63
Inc VAT
£120.63
-
£120.63
Current price
£120.63
Inc VAT
£100.53
-
£100.53
Exc VAT
Current price
£120.63
Exc VAT

Original price
£77.52
-
Original price
£77.52
Original price
£64.60
Exc VAT
£77.52
Inc VAT
£77.52
-
£77.52
Current price
£77.52
Inc VAT
£64.60
-
£64.60
Exc VAT
Current price
£77.52
Exc VAT
JCC JC080053 Skytile 600x600mm IP65 LED Panel 33W 4000K 3300lm White
Availability:
Dispatch in 2-3 Days
JCC JC080053 Skytile 600x600mm IP65 LED Panel 33W 4000K 3300lm White Product Description Flicker free driverUltra efficient 100LpcWprotection again...
View full details
Original price
£77.52
-
Original price
£77.52
Original price
£64.60
Exc VAT
£77.52
Inc VAT
£77.52
-
£77.52
Current price
£77.52
Inc VAT
£64.60
-
£64.60
Exc VAT
Current price
£77.52
Exc VAT

Original price
£112.92
-
Original price
£112.92
Original price
£94.10
Exc VAT
£112.92
Inc VAT
£112.92
-
£112.92
Current price
£112.92
Inc VAT
£94.10
-
£94.10
Exc VAT
Current price
£112.92
Exc VAT
JCC JC080053EM Skytile 600x600mm IP65 LED Panel 33W 4000K 3300lm White Emergency
Availability:
Dispatch in 2-3 Days
JCC JC080053EM Skytile 600x600mm IP65 LED Panel 33W 4000K 3300lm White Emergency Product Description Flicker free driverUltra efficient 100LpcWprot...
View full details
Original price
£112.92
-
Original price
£112.92
Original price
£94.10
Exc VAT
£112.92
Inc VAT
£112.92
-
£112.92
Current price
£112.92
Inc VAT
£94.10
-
£94.10
Exc VAT
Current price
£112.92
Exc VAT

Original price
£132.72
-
Original price
£132.72
Original price
£110.60
Exc VAT
£132.72
Inc VAT
£132.72
-
£132.72
Current price
£132.72
Inc VAT
£110.60
-
£110.60
Exc VAT
Current price
£132.72
Exc VAT
JCC JC080053EMST Skytile 600x600mm LED Panel 33W IP65 4000K 3300lm Self-test Emergency White
Availability:
Dispatch in 2-3 Days
JCC JC080053EMST Skytile 600x600mm LED Panel 33W IP65 4000K 3300lm Self-test Emergency White Product Description Flicker free driverUltra efficient...
View full details
Original price
£132.72
-
Original price
£132.72
Original price
£110.60
Exc VAT
£132.72
Inc VAT
£132.72
-
£132.72
Current price
£132.72
Inc VAT
£110.60
-
£110.60
Exc VAT
Current price
£132.72
Exc VAT

Original price
£35.40
-
Original price
£35.40
Original price
£29.50
Exc VAT
£35.40
Inc VAT
£35.40
-
£35.40
Current price
£35.40
Inc VAT
£29.50
-
£29.50
Exc VAT
Current price
£35.40
Exc VAT
JCC JC080100 Skytile 600x600mm 30W IP44 3000K 3000lm Tp(a) UGR <19
Availability:
Dispatch in 2-3 Days
JCC JC080100 Skytile 600x600mm 30W IP44 3000K 3000lm Tp(a) UGR <19 Product Description Meets TP(a) requirements, suitable for all applicationsUG...
View full details
Original price
£35.40
-
Original price
£35.40
Original price
£29.50
Exc VAT
£35.40
Inc VAT
£35.40
-
£35.40
Current price
£35.40
Inc VAT
£29.50
-
£29.50
Exc VAT
Current price
£35.40
Exc VAT

Original price
£77.76
-
Original price
£77.76
Original price
£64.80
Exc VAT
£77.76
Inc VAT
£77.76
-
£77.76
Current price
£77.76
Inc VAT
£64.80
-
£64.80
Exc VAT
Current price
£77.76
Exc VAT
JCC JC080101 Skytile 600x600mm 30W IP44 3000K 3000lm Tp(a) UGR <19 1-10V
Availability:
Dispatch in 2-3 Days
JCC JC080101 Skytile 600x600mm 30W IP44 3000K 3000lm Tp(a) UGR <19 1-10V Product Description Meets TP(a) requirements, suitable for all applicat...
View full details
Original price
£77.76
-
Original price
£77.76
Original price
£64.80
Exc VAT
£77.76
Inc VAT
£77.76
-
£77.76
Current price
£77.76
Inc VAT
£64.80
-
£64.80
Exc VAT
Current price
£77.76
Exc VAT

Original price
£77.76
-
Original price
£77.76
Original price
£64.80
Exc VAT
£77.76
Inc VAT
£77.76
-
£77.76
Current price
£77.76
Inc VAT
£64.80
-
£64.80
Exc VAT
Current price
£77.76
Exc VAT
JCC JC080102 Skytile 600x600mm 30W IP44 3000K 3000lm Tp(a) UGR <19 DALI
Availability:
Dispatch in 2-3 Days
JCC JC080102 Skytile 600x600mm 30W IP44 3000K 3000lm Tp(a) UGR <19 DALI Product Description Meets TP(a) requirements, suitable for all applicati...
View full details
Original price
£77.76
-
Original price
£77.76
Original price
£64.80
Exc VAT
£77.76
Inc VAT
£77.76
-
£77.76
Current price
£77.76
Inc VAT
£64.80
-
£64.80
Exc VAT
Current price
£77.76
Exc VAT

Original price
£93.72
-
Original price
£93.72
Original price
£78.10
Exc VAT
£93.72
Inc VAT
£93.72
-
£93.72
Current price
£93.72
Inc VAT
£78.10
-
£78.10
Exc VAT
Current price
£93.72
Exc VAT
JCC JC080103 Skytile 600x600mm 30W IP44 3000K 3000lm Tp(a) UGR <19 DSI
Availability:
Dispatch in 2-3 Days
JCC JC080103 Skytile 600x600mm 30W IP44 3000K 3000lm Tp(a) UGR <19 DSI Product Description Meets TP(a) requirements, suitable for all applicatio...
View full details
Original price
£93.72
-
Original price
£93.72
Original price
£78.10
Exc VAT
£93.72
Inc VAT
£93.72
-
£93.72
Current price
£93.72
Inc VAT
£78.10
-
£78.10
Exc VAT
Current price
£93.72
Exc VAT

Original price
£35.40
-
Original price
£35.40
Original price
£29.50
Exc VAT
£35.40
Inc VAT
£35.40
-
£35.40
Current price
£35.40
Inc VAT
£29.50
-
£29.50
Exc VAT
Current price
£35.40
Exc VAT
JCC JC080104 Skytile 600x600mm 30W IP44 4000K 3000lm Tp(a) UGR <19
Availability:
Dispatch in 2-3 Days
JCC JC080104 Skytile 600x600mm 30W IP44 4000K 3000lm Tp(a) UGR <19 Product Description Meets TP(a) requirements, suitable for all applicationsUG...
View full details
Original price
£35.40
-
Original price
£35.40
Original price
£29.50
Exc VAT
£35.40
Inc VAT
£35.40
-
£35.40
Current price
£35.40
Inc VAT
£29.50
-
£29.50
Exc VAT
Current price
£35.40
Exc VAT

Original price
£77.76
-
Original price
£77.76
Original price
£64.80
Exc VAT
£77.76
Inc VAT
£77.76
-
£77.76
Current price
£77.76
Inc VAT
£64.80
-
£64.80
Exc VAT
Current price
£77.76
Exc VAT
JCC JC080105 Skytile 600x600mm 30W IP44 4000K 3000lm Tp(a) UGR <19 1-10V
Availability:
Dispatch in 2-3 Days
JCC JC080105 Skytile 600x600mm 30W IP44 4000K 3000lm Tp(a) UGR <19 1-10V Product Description Meets TP(a) requirements, suitable for all applicat...
View full details
Original price
£77.76
-
Original price
£77.76
Original price
£64.80
Exc VAT
£77.76
Inc VAT
£77.76
-
£77.76
Current price
£77.76
Inc VAT
£64.80
-
£64.80
Exc VAT
Current price
£77.76
Exc VAT

Original price
£77.76
-
Original price
£77.76
Original price
£64.80
Exc VAT
£77.76
Inc VAT
£77.76
-
£77.76
Current price
£77.76
Inc VAT
£64.80
-
£64.80
Exc VAT
Current price
£77.76
Exc VAT
JCC JC080106 Skytile 600x600mm 30W IP44 4000K 3000lm Tp(a) UGR <19 DALI
Availability:
Dispatch in 2-3 Days
JCC JC080106 Skytile 600x600mm 30W IP44 4000K 3000lm Tp(a) UGR <19 DALI Product Description Meets TP(a) requirements, suitable for all applicati...
View full details
Original price
£77.76
-
Original price
£77.76
Original price
£64.80
Exc VAT
£77.76
Inc VAT
£77.76
-
£77.76
Current price
£77.76
Inc VAT
£64.80
-
£64.80
Exc VAT
Current price
£77.76
Exc VAT

Original price
£93.72
-
Original price
£93.72
Original price
£78.10
Exc VAT
£93.72
Inc VAT
£93.72
-
£93.72
Current price
£93.72
Inc VAT
£78.10
-
£78.10
Exc VAT
Current price
£93.72
Exc VAT
JCC JC080107 Skytile 600x600mm 30W IP44 4000K 3000lm Tp(a) UGR <19 DSI
Availability:
Dispatch in 2-3 Days
JCC JC080107 Skytile 600x600mm 30W IP44 4000K 3000lm Tp(a) UGR <19 DSI Product Description Meets TP(a) requirements, suitable for all applicatio...
View full details
Original price
£93.72
-
Original price
£93.72
Original price
£78.10
Exc VAT
£93.72
Inc VAT
£93.72
-
£93.72
Current price
£93.72
Inc VAT
£78.10
-
£78.10
Exc VAT
Current price
£93.72
Exc VAT
Original price
£35.40
-
Original price
£35.40
Original price
£29.50
Exc VAT
£35.40
Inc VAT
£35.40
-
£35.40
Current price
£35.40
Inc VAT
£29.50
-
£29.50
Exc VAT
Current price
£35.40
Exc VAT
JCC JC080108 Skytile 600x600mm 30W IP44 5700K 3000lm Tp(a) UGR <19
Availability:
Dispatch in 2-3 Days
JCC JC080108 Skytile 600x600mm 30W IP44 5700K 3000lm Tp(a) UGR <19 Product Description Meets TP(a) requirements, suitable for all applicationsUG...
View full details
Original price
£35.40
-
Original price
£35.40
Original price
£29.50
Exc VAT
£35.40
Inc VAT
£35.40
-
£35.40
Current price
£35.40
Inc VAT
£29.50
-
£29.50
Exc VAT
Current price
£35.40
Exc VAT

Original price
£77.76
-
Original price
£77.76
Original price
£64.80
Exc VAT
£77.76
Inc VAT
£77.76
-
£77.76
Current price
£77.76
Inc VAT
£64.80
-
£64.80
Exc VAT
Current price
£77.76
Exc VAT
JCC JC080109 Skytile 600x600mm 30W IP44 5700K 3000lm Tp(a) UGR <19 1-10V
Availability:
Dispatch in 2-3 Days
JCC JC080109 Skytile 600x600mm 30W IP44 5700K 3000lm Tp(a) UGR <19 1-10V Product Description Meets TP(a) requirements, suitable for all applicat...
View full details
Original price
£77.76
-
Original price
£77.76
Original price
£64.80
Exc VAT
£77.76
Inc VAT
£77.76
-
£77.76
Current price
£77.76
Inc VAT
£64.80
-
£64.80
Exc VAT
Current price
£77.76
Exc VAT

Original price
£77.76
-
Original price
£77.76
Original price
£64.80
Exc VAT
£77.76
Inc VAT
£77.76
-
£77.76
Current price
£77.76
Inc VAT
£64.80
-
£64.80
Exc VAT
Current price
£77.76
Exc VAT
JCC JC080110 Skytile 600x600mm 30W IP44 5700K 3000lm Tp(a) UGR <19 DALI
Availability:
Dispatch in 2-3 Days
JCC JC080110 Skytile 600x600mm 30W IP44 5700K 3000lm Tp(a) UGR <19 DALI Product Description Meets TP(a) requirements, suitable for all applicati...
View full details
Original price
£77.76
-
Original price
£77.76
Original price
£64.80
Exc VAT
£77.76
Inc VAT
£77.76
-
£77.76
Current price
£77.76
Inc VAT
£64.80
-
£64.80
Exc VAT
Current price
£77.76
Exc VAT

Original price
£93.72
-
Original price
£93.72
Original price
£78.10
Exc VAT
£93.72
Inc VAT
£93.72
-
£93.72
Current price
£93.72
Inc VAT
£78.10
-
£78.10
Exc VAT
Current price
£93.72
Exc VAT
JCC JC080111 Skytile 600x600mm 30W IP44 5700K 3000lm Tp(a) UGR <19 DSI
Availability:
Dispatch in 2-3 Days
JCC JC080111 Skytile 600x600mm 30W IP44 5700K 3000lm Tp(a) UGR <19 DSI Product Description Meets TP(a) requirements, suitable for all applicatio...
View full details
Original price
£93.72
-
Original price
£93.72
Original price
£78.10
Exc VAT
£93.72
Inc VAT
£93.72
-
£93.72
Current price
£93.72
Inc VAT
£78.10
-
£78.10
Exc VAT
Current price
£93.72
Exc VAT

Original price
£43.80
-
Original price
£43.80
Original price
£36.50
Exc VAT
£43.80
Inc VAT
£43.80
-
£43.80
Current price
£43.80
Inc VAT
£36.50
-
£36.50
Exc VAT
Current price
£43.80
Exc VAT
JCC JC080116 Skytile 1200x300mm 30W IP44 4000K 3000lm Tp(a) UGR <19
Availability:
Dispatch in 2-3 Days
JCC JC080116 Skytile 1200x300mm 30W IP44 4000K 3000lm Tp(a) UGR <19 Product Description Meets TP(a) requirements, suitable for all applicationsU...
View full details
Original price
£43.80
-
Original price
£43.80
Original price
£36.50
Exc VAT
£43.80
Inc VAT
£43.80
-
£43.80
Current price
£43.80
Inc VAT
£36.50
-
£36.50
Exc VAT
Current price
£43.80
Exc VAT

Original price
£86.16
-
Original price
£86.16
Original price
£71.80
Exc VAT
£86.16
Inc VAT
£86.16
-
£86.16
Current price
£86.16
Inc VAT
£71.80
-
£71.80
Exc VAT
Current price
£86.16
Exc VAT
JCC JC080117 Skytile 1200x300mm 30W IP44 4000K 3000lm Tp(a) UGR <19 1-10V
Availability:
Dispatch in 2-3 Days
JCC JC080117 Skytile 1200x300mm 30W IP44 4000K 3000lm Tp(a) UGR <19 1-10V Product Description Meets TP(a) requirements, suitable for all applica...
View full details
Original price
£86.16
-
Original price
£86.16
Original price
£71.80
Exc VAT
£86.16
Inc VAT
£86.16
-
£86.16
Current price
£86.16
Inc VAT
£71.80
-
£71.80
Exc VAT
Current price
£86.16
Exc VAT

Original price
£86.16
-
Original price
£86.16
Original price
£71.80
Exc VAT
£86.16
Inc VAT
£86.16
-
£86.16
Current price
£86.16
Inc VAT
£71.80
-
£71.80
Exc VAT
Current price
£86.16
Exc VAT
JCC JC080118 Skytile 1200x300mm 30W IP44 4000K 3000lm Tp(a) UGR <19 DALI
Availability:
Dispatch in 2-3 Days
JCC JC080118 Skytile 1200x300mm 30W IP44 4000K 3000lm Tp(a) UGR <19 DALI Product Description Meets TP(a) requirements, suitable for all applicat...
View full details
Original price
£86.16
-
Original price
£86.16
Original price
£71.80
Exc VAT
£86.16
Inc VAT
£86.16
-
£86.16
Current price
£86.16
Inc VAT
£71.80
-
£71.80
Exc VAT
Current price
£86.16
Exc VAT

Original price
£97.44
-
Original price
£97.44
Original price
£81.20
Exc VAT
£97.44
Inc VAT
£97.44
-
£97.44
Current price
£97.44
Inc VAT
£81.20
-
£81.20
Exc VAT
Current price
£97.44
Exc VAT
JCC JC080119 Skytile 1200x300mm 30W IP44 4000K 3000lm Tp(a) UGR <19 DSI
Availability:
Dispatch in 2-3 Days
JCC JC080119 Skytile 1200x300mm 30W IP44 4000K 3000lm Tp(a) UGR <19 DSI Product Description Meets TP(a) requirements, suitable for all applicati...
View full details
Original price
£97.44
-
Original price
£97.44
Original price
£81.20
Exc VAT
£97.44
Inc VAT
£97.44
-
£97.44
Current price
£97.44
Inc VAT
£81.20
-
£81.20
Exc VAT
Current price
£97.44
Exc VAT

Original price
£43.80
-
Original price
£43.80
Original price
£36.50
Exc VAT
£43.80
Inc VAT
£43.80
-
£43.80
Current price
£43.80
Inc VAT
£36.50
-
£36.50
Exc VAT
Current price
£43.80
Exc VAT
JCC JC080120 Skytile 1200x300mm 30W IP44 5700K 3000lm Tp(a) UGR <19
Availability:
Dispatch in 2-3 Days
JCC JC080120 Skytile 1200x300mm 30W IP44 5700K 3000lm Tp(a) UGR <19 Product Description Meets TP(a) requirements, suitable for all applicationsU...
View full details
Original price
£43.80
-
Original price
£43.80
Original price
£36.50
Exc VAT
£43.80
Inc VAT
£43.80
-
£43.80
Current price
£43.80
Inc VAT
£36.50
-
£36.50
Exc VAT
Current price
£43.80
Exc VAT

Original price
£86.16
-
Original price
£86.16
Original price
£71.80
Exc VAT
£86.16
Inc VAT
£86.16
-
£86.16
Current price
£86.16
Inc VAT
£71.80
-
£71.80
Exc VAT
Current price
£86.16
Exc VAT
JCC JC080121 Skytile 1200x300mm 30W IP44 5700K 3000lm Tp(a) UGR <19 1-10V
Availability:
Dispatch in 2-3 Days
JCC JC080121 Skytile 1200x300mm 30W IP44 5700K 3000lm Tp(a) UGR <19 1-10V Product Description Meets TP(a) requirements, suitable for all applica...
View full details
Original price
£86.16
-
Original price
£86.16
Original price
£71.80
Exc VAT
£86.16
Inc VAT
£86.16
-
£86.16
Current price
£86.16
Inc VAT
£71.80
-
£71.80
Exc VAT
Current price
£86.16
Exc VAT

Original price
£86.16
-
Original price
£86.16
Original price
£71.80
Exc VAT
£86.16
Inc VAT
£86.16
-
£86.16
Current price
£86.16
Inc VAT
£71.80
-
£71.80
Exc VAT
Current price
£86.16
Exc VAT
JCC JC080122 Skytile 1200x300mm 30W IP44 5700K 3000lm Tp(a) UGR <19 DALI
Availability:
Dispatch in 2-3 Days
JCC JC080122 Skytile 1200x300mm 30W IP44 5700K 3000lm Tp(a) UGR <19 DALI Product Description Meets TP(a) requirements, suitable for all applicat...
View full details
Original price
£86.16
-
Original price
£86.16
Original price
£71.80
Exc VAT
£86.16
Inc VAT
£86.16
-
£86.16
Current price
£86.16
Inc VAT
£71.80
-
£71.80
Exc VAT
Current price
£86.16
Exc VAT

Original price
£97.44
-
Original price
£97.44
Original price
£81.20
Exc VAT
£97.44
Inc VAT
£97.44
-
£97.44
Current price
£97.44
Inc VAT
£81.20
-
£81.20
Exc VAT
Current price
£97.44
Exc VAT
JCC JC080123 Skytile 1200x300mm 30W IP44 5700K 3000lm Tp(a) UGR <19 DSI
Availability:
Dispatch in 2-3 Days
JCC JC080123 Skytile 1200x300mm 30W IP44 5700K 3000lm Tp(a) UGR <19 DSI Product Description Meets TP(a) requirements, suitable for all applicati...
View full details
Original price
£97.44
-
Original price
£97.44
Original price
£81.20
Exc VAT
£97.44
Inc VAT
£97.44
-
£97.44
Current price
£97.44
Inc VAT
£81.20
-
£81.20
Exc VAT
Current price
£97.44
Exc VAT

Original price
£88.20
-
Original price
£88.20
Original price
£73.50
Exc VAT
£88.20
Inc VAT
£88.20
-
£88.20
Current price
£88.20
Inc VAT
£73.50
-
£73.50
Exc VAT
Current price
£88.20
Exc VAT
JCC JC080128 Skytile 1200x600mm 48W IP44 4000K 4800lm Tp(a) UGR <19
Availability:
Dispatch in 2-3 Days
JCC JC080128 Skytile 1200x600mm 48W IP44 4000K 4800lm Tp(a) UGR <19 Product Description Meets TP(a) requirements, suitable for all applicationsU...
View full details
Original price
£88.20
-
Original price
£88.20
Original price
£73.50
Exc VAT
£88.20
Inc VAT
£88.20
-
£88.20
Current price
£88.20
Inc VAT
£73.50
-
£73.50
Exc VAT
Current price
£88.20
Exc VAT

Original price
£130.56
-
Original price
£130.56
Original price
£108.80
Exc VAT
£130.56
Inc VAT
£130.56
-
£130.56
Current price
£130.56
Inc VAT
£108.80
-
£108.80
Exc VAT
Current price
£130.56
Exc VAT
JCC JC080129 Skytile 1200x600mm 48W IP44 4000K 4800lm Tp(a) UGR <19 1-10V
Availability:
Dispatch in 2-3 Days
JCC JC080129 Skytile 1200x600mm 48W IP44 4000K 4800lm Tp(a) UGR <19 1-10V Product Description Meets TP(a) requirements, suitable for all applica...
View full details
Original price
£130.56
-
Original price
£130.56
Original price
£108.80
Exc VAT
£130.56
Inc VAT
£130.56
-
£130.56
Current price
£130.56
Inc VAT
£108.80
-
£108.80
Exc VAT
Current price
£130.56
Exc VAT

Original price
£130.56
-
Original price
£130.56
Original price
£108.80
Exc VAT
£130.56
Inc VAT
£130.56
-
£130.56
Current price
£130.56
Inc VAT
£108.80
-
£108.80
Exc VAT
Current price
£130.56
Exc VAT
JCC JC080130 Skytile 1200x600mm 48W IP44 4000K 4800lm Tp(a) UGR <19 DALI
Availability:
Dispatch in 2-3 Days
JCC JC080130 Skytile 1200x600mm 48W IP44 4000K 4800lm Tp(a) UGR <19 DALI Product Description Meets TP(a) requirements, suitable for all applicat...
View full details
Original price
£130.56
-
Original price
£130.56
Original price
£108.80
Exc VAT
£130.56
Inc VAT
£130.56
-
£130.56
Current price
£130.56
Inc VAT
£108.80
-
£108.80
Exc VAT
Current price
£130.56
Exc VAT

Original price
£149.52
-
Original price
£149.52
Original price
£124.60
Exc VAT
£149.52
Inc VAT
£149.52
-
£149.52
Current price
£149.52
Inc VAT
£124.60
-
£124.60
Exc VAT
Current price
£149.52
Exc VAT
JCC JC080131 Skytile 1200x600mm 48W IP44 4000K 4800lm Tp(a) UGR <19 DSI
Availability:
Dispatch in 2-3 Days
JCC JC080131 Skytile 1200x600mm 48W IP44 4000K 4800lm Tp(a) UGR <19 DSI Product Description Meets TP(a) requirements, suitable for all applicati...
View full details
Original price
£149.52
-
Original price
£149.52
Original price
£124.60
Exc VAT
£149.52
Inc VAT
£149.52
-
£149.52
Current price
£149.52
Inc VAT
£124.60
-
£124.60
Exc VAT
Current price
£149.52
Exc VAT

Original price
£88.20
-
Original price
£88.20
Original price
£73.50
Exc VAT
£88.20
Inc VAT
£88.20
-
£88.20
Current price
£88.20
Inc VAT
£73.50
-
£73.50
Exc VAT
Current price
£88.20
Exc VAT
JCC JC080132 Skytile 1200x600mm 48W IP44 5700K 4800lm Tp(a) UGR <19
Availability:
Dispatch in 2-3 Days
JCC JC080132 Skytile 1200x600mm 48W IP44 5700K 4800lm Tp(a) UGR <19 Product Description Meets TP(a) requirements, suitable for all applicationsU...
View full details
Original price
£88.20
-
Original price
£88.20
Original price
£73.50
Exc VAT
£88.20
Inc VAT
£88.20
-
£88.20
Current price
£88.20
Inc VAT
£73.50
-
£73.50
Exc VAT
Current price
£88.20
Exc VAT

Original price
£130.56
-
Original price
£130.56
Original price
£108.80
Exc VAT
£130.56
Inc VAT
£130.56
-
£130.56
Current price
£130.56
Inc VAT
£108.80
-
£108.80
Exc VAT
Current price
£130.56
Exc VAT
JCC JC080133 Skytile 1200x600mm 48W IP44 5700K 4800lm Tp(a) UGR <19 1-10V
Availability:
Dispatch in 2-3 Days
JCC JC080133 Skytile 1200x600mm 48W IP44 5700K 4800lm Tp(a) UGR <19 1-10V Product Description Meets TP(a) requirements, suitable for all applica...
View full details
Original price
£130.56
-
Original price
£130.56
Original price
£108.80
Exc VAT
£130.56
Inc VAT
£130.56
-
£130.56
Current price
£130.56
Inc VAT
£108.80
-
£108.80
Exc VAT
Current price
£130.56
Exc VAT

Original price
£130.56
-
Original price
£130.56
Original price
£108.80
Exc VAT
£130.56
Inc VAT
£130.56
-
£130.56
Current price
£130.56
Inc VAT
£108.80
-
£108.80
Exc VAT
Current price
£130.56
Exc VAT
JCC JC080134 Skytile 1200x600mm 48W IP44 5700K 4800lm Tp(a) UGR <19 DALI
Availability:
Dispatch in 2-3 Days
JCC JC080134 Skytile 1200x600mm 48W IP44 5700K 4800lm Tp(a) UGR <19 DALI Product Description Meets TP(a) requirements, suitable for all applicat...
View full details
Original price
£130.56
-
Original price
£130.56
Original price
£108.80
Exc VAT
£130.56
Inc VAT
£130.56
-
£130.56
Current price
£130.56
Inc VAT
£108.80
-
£108.80
Exc VAT
Current price
£130.56
Exc VAT

Original price
£149.52
-
Original price
£149.52
Original price
£124.60
Exc VAT
£149.52
Inc VAT
£149.52
-
£149.52
Current price
£149.52
Inc VAT
£124.60
-
£124.60
Exc VAT
Current price
£149.52
Exc VAT
JCC JC080135 Skytile 1200x600mm 48W IP44 5700K 4800lm Tp(a) UGR <19 DSI
Availability:
Dispatch in 2-3 Days
JCC JC080135 Skytile 1200x600mm 48W IP44 5700K 4800lm Tp(a) UGR <19 DSI Product Description Meets TP(a) requirements, suitable for all applicati...
View full details
Original price
£149.52
-
Original price
£149.52
Original price
£124.60
Exc VAT
£149.52
Inc VAT
£149.52
-
£149.52
Current price
£149.52
Inc VAT
£124.60
-
£124.60
Exc VAT
Current price
£149.52
Exc VAT
Original price
£22.56
-
Original price
£22.56
Original price
£18.80
Exc VAT
£22.56
Inc VAT
£22.56
-
£22.56
Current price
£22.56
Inc VAT
£18.80
-
£18.80
Exc VAT
Current price
£22.56
Exc VAT
JCC JC080200 Skytile Base 600x600mm 16W IP40 CCT LED Panel 3000K/4000K/5700K TP(a) UGR <19
Availability:
Dispatch in 2-3 Days
JCC JC080200 Skytile Base 600x600mm 16W IP40 CCT LED Panel 3000K/4000K/5700K TP(a) UGR <19 Product Description Up to 119 LpcW3CCT 3000/4000/5700...
View full details
Original price
£22.56
-
Original price
£22.56
Original price
£18.80
Exc VAT
£22.56
Inc VAT
£22.56
-
£22.56
Current price
£22.56
Inc VAT
£18.80
-
£18.80
Exc VAT
Current price
£22.56
Exc VAT

Original price
£64.92
-
Original price
£64.92
Original price
£54.10
Exc VAT
£64.92
Inc VAT
£64.92
-
£64.92
Current price
£64.92
Inc VAT
£54.10
-
£54.10
Exc VAT
Current price
£64.92
Exc VAT
JCC JC080201 Skytile Base 600x600mm 16W IP40 CCT LED Panel 3000K/4000K/5700K TP(a) UGR <19 DALI/1-10V/Sw Dim
Availability:
Dispatch in 2-3 Days
JCC JC080201 Skytile Base 600x600mm 16W IP40 CCT LED Panel 3000K/4000K/5700K TP(a) UGR <19 DALI/1-10V/Sw Dim Product Description Up to 119 LpcW3...
View full details
Original price
£64.92
-
Original price
£64.92
Original price
£54.10
Exc VAT
£64.92
Inc VAT
£64.92
-
£64.92
Current price
£64.92
Inc VAT
£54.10
-
£54.10
Exc VAT
Current price
£64.92
Exc VAT

Original price
£93.12
-
Original price
£93.12
Original price
£77.60
Exc VAT
£93.12
Inc VAT
£93.12
-
£93.12
Current price
£93.12
Inc VAT
£77.60
-
£77.60
Exc VAT
Current price
£93.12
Exc VAT
JCC JC080202 Skytile Base 600x600mm 16W IP40 CCT LED Panel 3000K/4000K/5700K TP(a) UGR <19 DSI
Availability:
Dispatch in 2-3 Days
JCC JC080202 Skytile Base 600x600mm 16W IP40 CCT LED Panel 3000K/4000K/5700K TP(a) UGR <19 DSI Product Description Up to 119 LpcW3CCT 3000/4000/...
View full details
Original price
£93.12
-
Original price
£93.12
Original price
£77.60
Exc VAT
£93.12
Inc VAT
£93.12
-
£93.12
Current price
£93.12
Inc VAT
£77.60
-
£77.60
Exc VAT
Current price
£93.12
Exc VAT

Original price
£22.56
-
Original price
£22.56
Original price
£18.80
Exc VAT
£22.56
Inc VAT
£22.56
-
£22.56
Current price
£22.56
Inc VAT
£18.80
-
£18.80
Exc VAT
Current price
£22.56
Exc VAT
JCC JC080203 Skytile Base 600x600mm 30W IP40 CCT LED Panel 3000K/4000K/5700K TP(a) UGR <19
Availability:
Dispatch in 2-3 Days
JCC JC080203 Skytile Base 600x600mm 30W IP40 CCT LED Panel 3000K/4000K/5700K TP(a) UGR <19 Product Description Up to 112 LpcW3CCT 3000/4000/5700...
View full details
Original price
£22.56
-
Original price
£22.56
Original price
£18.80
Exc VAT
£22.56
Inc VAT
£22.56
-
£22.56
Current price
£22.56
Inc VAT
£18.80
-
£18.80
Exc VAT
Current price
£22.56
Exc VAT

Original price
£64.92
-
Original price
£64.92
Original price
£54.10
Exc VAT
£64.92
Inc VAT
£64.92
-
£64.92
Current price
£64.92
Inc VAT
£54.10
-
£54.10
Exc VAT
Current price
£64.92
Exc VAT
JCC JC080204 Skytile Base 600x600mm 30W IP40 CCT LED Panel 3000K/4000K/5700K TP(a) UGR <19 DALI/1-10V/Sw Dim
Availability:
Dispatch in 2-3 Days
JCC JC080204 Skytile Base 600x600mm 30W IP40 CCT LED Panel 3000K/4000K/5700K TP(a) UGR <19 DALI/1-10V/Sw Dim Product Description Up to 112 LpcW3...
View full details
Original price
£64.92
-
Original price
£64.92
Original price
£54.10
Exc VAT
£64.92
Inc VAT
£64.92
-
£64.92
Current price
£64.92
Inc VAT
£54.10
-
£54.10
Exc VAT
Current price
£64.92
Exc VAT

Original price
£93.12
-
Original price
£93.12
Original price
£77.60
Exc VAT
£93.12
Inc VAT
£93.12
-
£93.12
Current price
£93.12
Inc VAT
£77.60
-
£77.60
Exc VAT
Current price
£93.12
Exc VAT
JCC JC080205 Skytile Base 600x600mm 30W IP40 CCT LED Panel 3000K/4000K/5700K TP(a) UGR <19 DSI
Availability:
Dispatch in 2-3 Days
JCC JC080205 Skytile Base 600x600mm 30W IP40 CCT LED Panel 3000K/4000K/5700K TP(a) UGR <19 DSI Product Description Up to 112 LpcW3CCT 3000/4000/...
View full details
Original price
£93.12
-
Original price
£93.12
Original price
£77.60
Exc VAT
£93.12
Inc VAT
£93.12
-
£93.12
Current price
£93.12
Inc VAT
£77.60
-
£77.60
Exc VAT
Current price
£93.12
Exc VAT

Original price
£22.56
-
Original price
£22.56
Original price
£18.80
Exc VAT
£22.56
Inc VAT
£22.56
-
£22.56
Current price
£22.56
Inc VAT
£18.80
-
£18.80
Exc VAT
Current price
£22.56
Exc VAT
JCC JC080206 Skytile Base 600x600mm 38W IP40 CCT LED Panel 3000K/4000K/5700K TP(a) UGR <19
Availability:
Dispatch in 2-3 Days
JCC JC080206 Skytile Base 600x600mm 38W IP40 CCT LED Panel 3000K/4000K/5700K TP(a) UGR <19 Product Description Up to 108 LpcW3CCT 3000/4000/5700...
View full details
Original price
£22.56
-
Original price
£22.56
Original price
£18.80
Exc VAT
£22.56
Inc VAT
£22.56
-
£22.56
Current price
£22.56
Inc VAT
£18.80
-
£18.80
Exc VAT
Current price
£22.56
Exc VAT

Original price
£64.92
-
Original price
£64.92
Original price
£54.10
Exc VAT
£64.92
Inc VAT
£64.92
-
£64.92
Current price
£64.92
Inc VAT
£54.10
-
£54.10
Exc VAT
Current price
£64.92
Exc VAT
JCC JC080207 Skytile Base 600x600mm 38W IP40 CCT LED Panel 3000K/4000K/5700K TP(a) UGR <19 DALI/1-10V/Sw Dim
Availability:
Dispatch in 2-3 Days
JCC JC080207 Skytile Base 600x600mm 38W IP40 CCT LED Panel 3000K/4000K/5700K TP(a) UGR <19 DALI/1-10V/Sw Dim Product Description Up to 108 Lpc...
View full details
Original price
£64.92
-
Original price
£64.92
Original price
£54.10
Exc VAT
£64.92
Inc VAT
£64.92
-
£64.92
Current price
£64.92
Inc VAT
£54.10
-
£54.10
Exc VAT
Current price
£64.92
Exc VAT

Original price
£93.12
-
Original price
£93.12
Original price
£77.60
Exc VAT
£93.12
Inc VAT
£93.12
-
£93.12
Current price
£93.12
Inc VAT
£77.60
-
£77.60
Exc VAT
Current price
£93.12
Exc VAT
JCC JC080208 Skytile Base 600x600mm 38W IP40 CCT LED Panel 3000K/4000K/5700K TP(a) UGR <19 DSI
Availability:
Dispatch in 2-3 Days
JCC JC080208 Skytile Base 600x600mm 38W IP40 CCT LED Panel 3000K/4000K/5700K TP(a) UGR <19 DSI Product Description Up to 108 LpcW3CCT 3000/4000/...
View full details
Original price
£93.12
-
Original price
£93.12
Original price
£77.60
Exc VAT
£93.12
Inc VAT
£93.12
-
£93.12
Current price
£93.12
Inc VAT
£77.60
-
£77.60
Exc VAT
Current price
£93.12
Exc VAT

Original price
£43.80
-
Original price
£43.80
Original price
£36.50
Exc VAT
£43.80
Inc VAT
£43.80
-
£43.80
Current price
£43.80
Inc VAT
£36.50
-
£36.50
Exc VAT
Current price
£43.80
Exc VAT
JCC JC080209 Skytile Base 1200x300mm 30W IP40 CCT LED Panel 3000K/4000K/5700K TP(a) UGR <19
Availability:
Dispatch in 2-3 Days
JCC JC080209 Skytile Base 1200x300mm 30W IP40 CCT LED Panel 3000K/4000K/5700K TP(a) UGR <19 Product Description Up to 107 LpcW3CCT 3000/4000/570...
View full details
Original price
£43.80
-
Original price
£43.80
Original price
£36.50
Exc VAT
£43.80
Inc VAT
£43.80
-
£43.80
Current price
£43.80
Inc VAT
£36.50
-
£36.50
Exc VAT
Current price
£43.80
Exc VAT
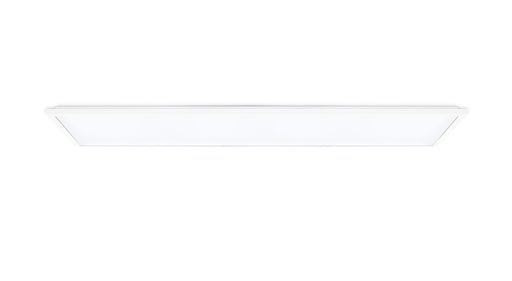
Original price
£86.16
-
Original price
£86.16
Original price
£71.80
Exc VAT
£86.16
Inc VAT
£86.16
-
£86.16
Current price
£86.16
Inc VAT
£71.80
-
£71.80
Exc VAT
Current price
£86.16
Exc VAT
JCC JC080210 Skytile Base 1200x300mm 30W IP40 CCT LED Panel 3000K/4000K/5700K TP(a) UGR <19 DALI/1-10V/Sw Dim
Availability:
Dispatch in 2-3 Days
JCC JC080210 Skytile Base 1200x300mm 30W IP40 CCT LED Panel 3000K/4000K/5700K TP(a) UGR <19 DALI/1-10V/Sw Dim Product Description Up to 107 LpcW...
View full details
Original price
£86.16
-
Original price
£86.16
Original price
£71.80
Exc VAT
£86.16
Inc VAT
£86.16
-
£86.16
Current price
£86.16
Inc VAT
£71.80
-
£71.80
Exc VAT
Current price
£86.16
Exc VAT

Original price
£114.48
-
Original price
£114.48
Original price
£95.40
Exc VAT
£114.48
Inc VAT
£114.48
-
£114.48
Current price
£114.48
Inc VAT
£95.40
-
£95.40
Exc VAT
Current price
£114.48
Exc VAT
JCC JC080211 Skytile Base 1200x300mm 30W IP40 CCT LED Panel 3000K/4000K/5700K TP(a) UGR <19 DSI
Availability:
Dispatch in 2-3 Days
JCC JC080211 Skytile Base 1200x300mm 30W IP40 CCT LED Panel 3000K/4000K/5700K TP(a) UGR <19 DSI Product Description Up to 107 LpcW3CCT 3000/4000...
View full details
Original price
£114.48
-
Original price
£114.48
Original price
£95.40
Exc VAT
£114.48
Inc VAT
£114.48
-
£114.48
Current price
£114.48
Inc VAT
£95.40
-
£95.40
Exc VAT
Current price
£114.48
Exc VAT
Original price
£88.20
-
Original price
£88.20
Original price
£73.50
Exc VAT
£88.20
Inc VAT
£88.20
-
£88.20
Current price
£88.20
Inc VAT
£73.50
-
£73.50
Exc VAT
Current price
£88.20
Exc VAT
JCC JC080212 Skytile Base 1200x600mm 40W IP40 CCT LED Panel 3000K/4000K/5700K TP(a) UGR <19
Availability:
Dispatch in 2-3 Days
JCC JC080212 Skytile Base 1200x600mm 40W IP40 CCT LED Panel 3000K/4000K/5700K TP(a) UGR <19 Product Description Up to 121 LpcW3CCT 3000/4000/570...
View full details
Original price
£88.20
-
Original price
£88.20
Original price
£73.50
Exc VAT
£88.20
Inc VAT
£88.20
-
£88.20
Current price
£88.20
Inc VAT
£73.50
-
£73.50
Exc VAT
Current price
£88.20
Exc VAT

Original price
£130.56
-
Original price
£130.56
Original price
£108.80
Exc VAT
£130.56
Inc VAT
£130.56
-
£130.56
Current price
£130.56
Inc VAT
£108.80
-
£108.80
Exc VAT
Current price
£130.56
Exc VAT
JCC JC080213 Skytile Base 1200x600mm 40W IP40 CCT LED Panel 3000K/4000K/5700K TP(a) UGR <19 DALI/1-10V/Sw Dim
Availability:
Dispatch in 2-3 Days
JCC JC080213 Skytile Base 1200x600mm 40W IP40 CCT LED Panel 3000K/4000K/5700K TP(a) UGR <19 DALI/1-10V/Sw Dim Product Description Up to 121 LpcW...
View full details
Original price
£130.56
-
Original price
£130.56
Original price
£108.80
Exc VAT
£130.56
Inc VAT
£130.56
-
£130.56
Current price
£130.56
Inc VAT
£108.80
-
£108.80
Exc VAT
Current price
£130.56
Exc VAT

Original price
£158.88
-
Original price
£158.88
Original price
£132.40
Exc VAT
£158.88
Inc VAT
£158.88
-
£158.88
Current price
£158.88
Inc VAT
£132.40
-
£132.40
Exc VAT
Current price
£158.88
Exc VAT
JCC JC080214 Skytile Base 1200x600mm 40W IP40 CCT LED Panel 3000K/4000K/5700K TP(a) UGR <19 DSI
Availability:
Dispatch in 2-3 Days
JCC JC080214 Skytile Base 1200x600mm 40W IP40 CCT LED Panel 3000K/4000K/5700K TP(a) UGR <19 DSI Product Description Up to 121 LpcW3CCT 3000/4000...
View full details
Original price
£158.88
-
Original price
£158.88
Original price
£132.40
Exc VAT
£158.88
Inc VAT
£158.88
-
£158.88
Current price
£158.88
Inc VAT
£132.40
-
£132.40
Exc VAT
Current price
£158.88
Exc VAT

Original price
£19.68
-
Original price
£19.68
Original price
£16.40
Exc VAT
£19.68
Inc VAT
£19.68
-
£19.68
Current price
£19.68
Inc VAT
£16.40
-
£16.40
Exc VAT
Current price
£19.68
Exc VAT
JCC JC080215 Skytile Base 600x600mm 16W IP40 CCT LED Panel 3000K/4000K/5700K TP(a)
Availability:
Dispatch in 2-3 Days
JCC JC080215 Skytile Base 600x600mm 16W IP40 CCT LED Panel 3000K/4000K/5700K TP(a) Product Description Up to 131 LpcW3CCT 3000/4000/5700K selectabl...
View full details
Original price
£19.68
-
Original price
£19.68
Original price
£16.40
Exc VAT
£19.68
Inc VAT
£19.68
-
£19.68
Current price
£19.68
Inc VAT
£16.40
-
£16.40
Exc VAT
Current price
£19.68
Exc VAT
 JCC JC080216 Skytile Base 600x600mm 16W IP40 CCT LED Panel 3000K/4000K/5700K TP(a) DALI/1-10V/Sw Dim
Original price
£62.04
-
Original price
£62.04
Original price
£51.70
Exc VAT
£62.04
Inc VAT
£62.04
-
£62.04
Current price
£62.04
Inc VAT
£51.70
-
£51.70
Exc VAT
Current price
£62.04
Exc VAT
JCC JC080216 Skytile Base 600x600mm 16W IP40 CCT LED Panel 3000K/4000K/5700K TP(a) DALI/1-10V/Sw Dim
Availability:
Dispatch in 2-3 Days
JCC JC080216 Skytile Base 600x600mm 16W IP40 CCT LED Panel 3000K/4000K/5700K TP(a) DALI/1-10V/Sw Dim Product Description Up to 131 LpcW3CCT 3000/40...
View full details
Original price
£62.04
-
Original price
£62.04
Original price
£51.70
Exc VAT
£62.04
Inc VAT
£62.04
-
£62.04
Current price
£62.04
Inc VAT
£51.70
-
£51.70
Exc VAT
Current price
£62.04
Exc VAT

Original price
£90.24
-
Original price
£90.24
Original price
£75.20
Exc VAT
£90.24
Inc VAT
£90.24
-
£90.24
Current price
£90.24
Inc VAT
£75.20
-
£75.20
Exc VAT
Current price
£90.24
Exc VAT
JCC JC080217 Skytile Base 600x600mm 16W IP40 CCT LED Panel 3000K/4000K/5700K TP(a) DSI
Availability:
Dispatch in 2-3 Days
JCC JC080217 Skytile Base 600x600mm 16W IP40 CCT LED Panel 3000K/4000K/5700K TP(a) DSI Product Description Up to 131 LpcW3CCT 3000/4000/5700K selec...
View full details
Original price
£90.24
-
Original price
£90.24
Original price
£75.20
Exc VAT
£90.24
Inc VAT
£90.24
-
£90.24
Current price
£90.24
Inc VAT
£75.20
-
£75.20
Exc VAT
Current price
£90.24
Exc VAT

Original price
£19.68
-
Original price
£19.68
Original price
£16.40
Exc VAT
£19.68
Inc VAT
£19.68
-
£19.68
Current price
£19.68
Inc VAT
£16.40
-
£16.40
Exc VAT
Current price
£19.68
Exc VAT
JCC JC080218 Skytile Base 600x600mm 30W IP40 CCT LED Panel 3000K/4000K/5700K TP(a)
Availability:
Dispatch in 2-3 Days
JCC JC080218 Skytile Base 600x600mm 30W IP40 CCT LED Panel 3000K/4000K/5700K TP(a) Product Description Up to 125 LpcW3CCT 3000/4000/5700K selectabl...
View full details
Original price
£19.68
-
Original price
£19.68
Original price
£16.40
Exc VAT
£19.68
Inc VAT
£19.68
-
£19.68
Current price
£19.68
Inc VAT
£16.40
-
£16.40
Exc VAT
Current price
£19.68
Exc VAT
 JCC JC080219 Skytile Base 600x600mm 30W IP40 CCT LED Panel 3000K/4000K/5700K TP(a) DALI/1-10V/Sw Dim
Original price
£62.04
-
Original price
£62.04
Original price
£51.70
Exc VAT
£62.04
Inc VAT
£62.04
-
£62.04
Current price
£62.04
Inc VAT
£51.70
-
£51.70
Exc VAT
Current price
£62.04
Exc VAT
JCC JC080219 Skytile Base 600x600mm 30W IP40 CCT LED Panel 3000K/4000K/5700K TP(a) DALI/1-10V/Sw Dim
Availability:
Dispatch in 2-3 Days
JCC JC080219 Skytile Base 600x600mm 30W IP40 CCT LED Panel 3000K/4000K/5700K TP(a) DALI/1-10V/Sw Dim Product Description Up to 125 LpcW3CCT 3000/40...
View full details
Original price
£62.04
-
Original price
£62.04
Original price
£51.70
Exc VAT
£62.04
Inc VAT
£62.04
-
£62.04
Current price
£62.04
Inc VAT
£51.70
-
£51.70
Exc VAT
Current price
£62.04
Exc VAT

Original price
£90.24
-
Original price
£90.24
Original price
£75.20
Exc VAT
£90.24
Inc VAT
£90.24
-
£90.24
Current price
£90.24
Inc VAT
£75.20
-
£75.20
Exc VAT
Current price
£90.24
Exc VAT
JCC JC080220 Skytile Base 600x600mm 30W IP40 CCT LED Panel 3000K/4000K/5700K TP(a) DSI
Availability:
Dispatch in 2-3 Days
JCC JC080220 Skytile Base 600x600mm 30W IP40 CCT LED Panel 3000K/4000K/5700K TP(a) DSI Product Description Up to 125 LpcW3CCT 3000/4000/5700K selec...
View full details
Original price
£90.24
-
Original price
£90.24
Original price
£75.20
Exc VAT
£90.24
Inc VAT
£90.24
-
£90.24
Current price
£90.24
Inc VAT
£75.20
-
£75.20
Exc VAT
Current price
£90.24
Exc VAT

Original price
£21.84
-
Original price
£21.84
Original price
£18.20
Exc VAT
£21.84
Inc VAT
£21.84
-
£21.84
Current price
£21.84
Inc VAT
£18.20
-
£18.20
Exc VAT
Current price
£21.84
Exc VAT
JCC JC080221 Skytile Base 600x600mm 38W IP40 CCT LED Panel 3000K/4000K/5700K TP(a)
Availability:
Dispatch in 2-3 Days
JCC JC080221 Skytile Base 600x600mm 38W IP40 CCT LED Panel 3000K/4000K/5700K TP(a) Product Description Up to 122 LpcW3CCT 3000/4000/5700K selectabl...
View full details
Original price
£21.84
-
Original price
£21.84
Original price
£18.20
Exc VAT
£21.84
Inc VAT
£21.84
-
£21.84
Current price
£21.84
Inc VAT
£18.20
-
£18.20
Exc VAT
Current price
£21.84
Exc VAT